How To
This section contains all of the How To entries that appear in other sections of this user guide.
Getting Started
Creating Your First Tour
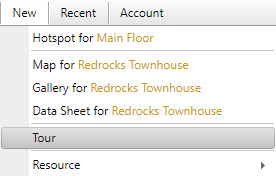
How to create a new tour
- Choose New > Tour from the Tour Builder menu
- On the Create New Tour screen:
- Select the Show step-by-step instructions option
- Follow the instructions
- To save time, use the sample map and hotspot images that are provided
Learn about Creating Your First Tour
Map Editor
How to get to the Map Editor

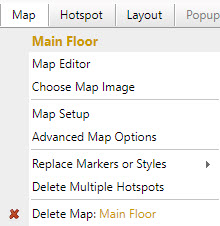
- Click the map icon (red arrow ) or choose Map > Map Editor from the Tour Builder Menu.
Learn about Map Editor
How to set the size of the Map Editor
The dimensions of the Map Editor are determined by the tour's width and height setting on the Advanced Tour Layout screen.
You cannot change the size of the Map Editor for a Classic tour unless you change the tour's size and/or its layout. This is because the width and height of the Map Editor are the same as the dimensions of the tour's map area when the tour is displayed at its full size (not scaled down to fit a smaller browser window). The dimensions of the tour's map area are determined by the tour's layout and the values of the Width and Height options you specified for the tour on the Advanced Tour Layout screen.
The tour Width and Height values you specify for a Flex Map tour on the Advanced Tour Layout screen determine the size of the Map Editor. Those values do not affect the tour size because the maps in a Flex Map tour automatically size to best fit the device they are being displayed on. Therefore, you can change the tour width and height values for a Flex Map tour to make the Map Editor larger or smaller without affecting the size of the tour itself.
Learn about Map Editor
Publishing a Tour
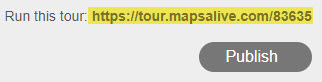
How to publish a tour
- View the tour in Tour Preview
- On the Tour Preview screen:
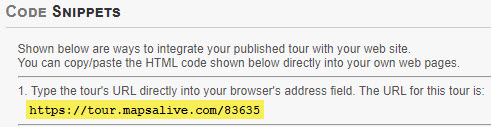
- Click the orange Publish button
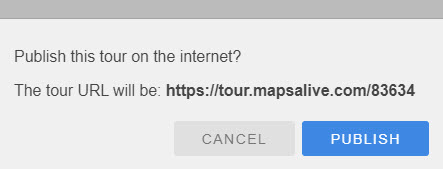
- A confirmation dialog appears as shown below that shows the tour's URL
- Click the blue Publish button on the dialog
After a few seconds:
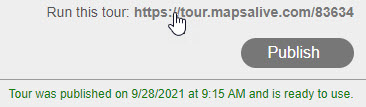
Learn about Publishing a Tour
Responsive Tours
How to control when a tour switches to stacked layout
See the documentation for the stacked-layout tour setting.
Learn about Responsive Tours
How to prevent a tour from switching to stacked layout when the browser is narrow
Use the API's setTourSetting function to set the stacked-layout setting as shown below. You can place the code in the JavaScript field of the Custom HTML screen.
function onEventPageLoaded(event) {
   event.api.setTourSetting("stacked-layout",0);
}
Learn about Responsive Tours
Previewing a Tour
How to preview a tour
To get to the Tour Preview screen:
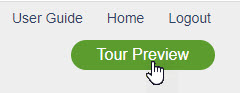
- Click the Tour Preview button that appears at the upper right on most Tour Builder pages
- A screen similar to the one shown below will appear
- When done, click Return to Tour Builder to make more changes, or click the Publish button to publish the tour.
Learn about Previewing a Tour
Reference
Banners
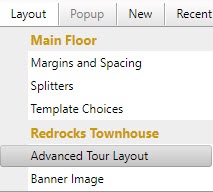
How to add a banner to a tour
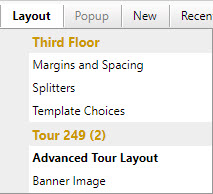
- Choose Layout > Banner Image from the Tour Builder menu
- On the Banner Image screen:
- Click Choose File and browse for your banner image on your computer
- Click Load
You cannot add a banner to a Flex map tour.
Learn about Banners
How to create an unbranded tour
To create a tour that can be used both branded and unbranded:
- Choose Tour > Tour Manager from the menu
- On the Tour Manager screen:
- Check Allow Banner Hiding in the Advanced Options section
When you publish your tour, you can run your tour as follows:
Branded:
tour.mapsalive.com/12345
tour.mapsalive.com/12345/page1.htm
Unbranded:
tour.mapsalive.com/12345/?nobanner
tour.mapsalive.com/12345/page1.htm?nobanner
tour.mapsalive.com/12345/index.htm?page=1&nobanner
Learn about Banners
How to link to a web page from a banner
- Choose Layout > Banner Image from the Tour Builder menu
- On the Banner Image screen:
- Type the URL for the web page
- Check the Open URL in New Window box if you want the web page to open in a separate browser window
- To add a tooltip type the text in the Tooltip Text field
Learn about Banners
How to remove a banner from a tour
- Choose Layout > Banner Image from the Tour Builder menu
- On the Banner Image screen:
- Click the Remove banner link
Learn about Banners
How to replace a banner in a tour
Follow the same steps as for adding a banner to a tour. You do not need to remove an existing banner first.
Learn about Banners
How to set the background color of a banner
The banner background color is part of your tour's color scheme.
- Choose Layout > Advanced Tour Layout from the Tour Builder menu
- On the Advanced Tour Layout screen:
- Click the Edit link next to the Color Scheme dropdown
- On the Edit Color Scheme screen:
- Set a background color in the Banner Background field
Learn about Banners
Categories
How to add a new category
- Choose New > Resource > Category from the Tour Builder menu
- On the Edit Cateory screen:
- Choose a category name and code
- Choose Directory Group from the Type dropdown
Learn about Categories
How to assign a category to a hotspot
- Choose Hotspot > Advanced Hotspot Options from the Tour Builder menu
- On the Advanced Hotspot Options screen:
- Check the categories in the Categories List. You can choose more than one category for a hotspot.
Learn about Categories
How to create a Hotspot Image Size Override category
- Choose New > Resource > Category from the Tour Builder menu
- On the Edit Cateory screen:
- Choose a category name and code
- Choose Hotspot Image Size Override from the Type dropdown
- Specify the width and height
Learn about Categories
How to delete a category
- Choose Library > Categories from the Tour Builder menu
- On the Categories Library screen:
- Click the name of the category you want to delete
- Choose Library > Delete from the menu
You cannot delete a category that is used by a hotspot. You can see how many hotspots are using a category on the Category Library screen. Click the Usage Count number to see which hotspots maps are using the category.
Learn about Categories
How to edit a new category
- Choose Library > Categories from the Tour Builder menu
- Click the name of the category you want to edit
Learn about Categories
How to filter categories to see only the ones used by the current tour
- Choose Library > Categories from the Tour Builder menu
- Then, choose Library > Filter Categories from the menu
Uncheck Filter Categories to stop filtering.
Learn about Categories
How to see all the categories in your MapsAlive account
- Choose Library > Categories from the Tour Builder menu
Learn about Categories
Color Schemes
How to choose the color scheme for a tour
- Choose Layout > Advanced Tour Layout from the Tour Builder menu
- On the Advanced Tour Layout screen:
- Select a color scheme name from the Color Scheme dropdown
Learn about Color Schemes
How to create a new color scheme
- Choose New > Resource > Color Scheme from the Tour Builder menu
- On the Edit Color Scheme screen:
- Choose colors for the tour elements
Learn about Color Schemes
How to delete a color scheme
- Choose Library > Color Schemes from the Tour Builder menu
- On the Color Scheme Library screen:
- Click the name or image of the color scheme you want to delete
- Choose Library > Delete from the menu
You cannot delete a color scheme that is used by a tour.
Learn about Color Schemes
How to delete all unused color schemes from your account
- Choose Library > Color Schemes from the Tour Builder menu
- On the Color Scheme Library screen:
- Choose Library > Delete Unused Color Schemes
This will delete all color schemes that are not used by any tours.
Learn about Color Schemes
How to duplicate a color scheme
Making a copy is a good way to customize a color scheme without modifying the original.
- Choose Library > Color Schemes from the Tour Builder menu
- On the Color Scheme Library screen:
- Click the name or image of the color scheme you want to duplicate
- Choose Library > Duplicate from the menu
Learn about Color Schemes
How to edit a color scheme
- Choose Library > Color Scheme from the Tour Builder menu
- On the Color Scheme Library screen:
- Click the name or image of the color scheme you want to edit
When you edit a color scheme, all tours that use that scheme are affected. To have the changes apply to only one tour, duplicate an existing color scheme, make the changes to the copy, and use the copy for the tour that needs the changes. This way the original color scheme does not change and other tours won't be affected.
Learn about Color Schemes
Data Sheets
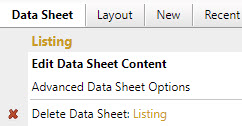
Data Sheet menu
The Data Sheet menu item is only available when you have selected a data sheet in the Tour Navigator.
Learn about Data Sheets
How to add a data sheet to a tour
- Choose New > Data Sheet from the Tour Builder menu
- On the Edit Data Sheet screen:
- Give the data sheet a name
- Upload a photo and/or add text
Learn about Data Sheets
How to choose a data sheet template
- Choose Layout > Template Choices from the Tour Builder menu
- On the Template Choices screen:
- Click a template thumbnail
Learn about Data Sheets
How to delete a data sheet
Do one of the following:
- Choose Tour > Tour Manager from the Tour Builder menu, and then click the trash can icon under the data sheet's thumbnail image.
-
Choose Data Sheet > Delete from the menu to delete the currently selected Data Sheet.
- Click OK on the confirmation dialog. This step displays a second confirmation dialog asking if you are sure you want to delete the data sheet.
- Click OK on the second confirmation dialog. The data sheet is deleted from the tour.
Caution
A deleted map, gallery, or data sheet, along with its hotspots, cannot be recovered. It is permanently removed from our database and cannot be restored.
Learn about Data Sheets
Directories
How to customize the directory text labels
- Choose Tour > Directory Options from the Tour Builder menu
- On the Directory Options screen:
- Use the Text Options to change the labels for the sort button and search box
Learn about Directories
How to enable or disable the directory feature
- Choose Tour > Directory Options from the Tour Builder menu
- On the Directory Options screen:
- Check or uncheck the Show Directory option
Learn about Directories
How to exclude a hotspot from the directory
- Choose Hotspot > Advanced Hotspot Options from the Tour Builder menu
- On the Advanced Hotspot Options screen:
- Check the Exclude From Directory checkbox
Learn about Directories
How to group entries in the directory
- Choose Tour > Directory Options from the Tour Builder menu
- On the Directory Options screen:
- Choose a grouping option from the Grouping dropdown
Learn about Directories
How to keep the directory panel open
- Choose Tour > Directory Options from the Tour Builder menu
- On the Directory Options screen:
- Check the Stay Open checkbox
Learn about Directories
How to set directory colors
- Choose Tour > Directory Options from the Tour Builder menu
- On the Directory Options screen:
- In the Colors section, select colors by clicking on the color swatch
Learn about Directories
How to set the size of the directory panel
- Choose Tour > Directory Options from the Tour Builder menu
- On the Directory Options screen:
- Use the size options to control the width and height of the directory panel and preview
Learn about Directories
How to show or hide the directory Search box
- Choose Tour > Directory Options from the Tour Builder menu
- On the Directory Options screen:
- Check or uncheck the Show Search Box checkbox
Learn about Directories
How to show or hide the image and text preview in the directory
- Choose Tour > Directory Options from the Tour Builder menu
- On the Directory Options screen:
- Check or uncheck the Show Image Preview and Show Text Preview boxes
Learn about Directories
Flex Map & Classic Tours
How to convert a Classic Tour to a Flex Map tour
- Choose Tour > Tour Setup from the Tour Builder menu
- On the Tour Setup screen:
- If the Flex Map option is enabled:
- Choose Flex Map as the Tour Type
- If the Flex Map option is enabled:
If the Flex Map option is disabled, you'll see a list of Classic tour features the tour is using which are not supported by Flex Map tours. To convert the tour to a Flex Map, you would need to change the tour to not use any of those features.
Learn about Flex Map & Classic Tours
How to convert a Flex Map tour to a Classic tour
- Choose Tour > Tour Setup from the Tour Builder menu
- On the Tour Setup screen:
- Choose Classic tour as the Tour Type
Learn about Flex Map & Classic Tours
How to create a Classic tour
- Choose New > Tour from the Tour Builder menu
- On the Create New Tour screen:
- Choose either help option
- Click the Continue button
- On the New Tour Setup screen:
- Choose Classic tour as the Tour Type
- Click the Continue button
Learn about Flex Map & Classic Tours
How to create a Flex Map tour
- Choose New > Tour from the Tour Builder menu
- On the Create New Tour screen:
- Choose either help option
- Click the Continue button
- On the New Tour Setup screen:
- Choose Flex Map as the Tour Type
- Click the Continue button
Learn about Flex Map & Classic Tours
Font Styles
How to create a new font style
- Choose New > Resource > Font Style from the Tour Builder menu
- On the Edit Font Style screen:
- Choose the font family, size, and weight
Learn about Font Styles
How to delete a font style
- Choose Library > Font Styles from the Tour Builder menu
- On the Font Style Library screen:
- Click the name or image of the font style you want to delete
- Choose Library > Delete Font Style from the meu
You cannot delete a font style that is in use.
Learn about Font Styles
How to delete all unused font styles from your account
- Choose Library > Font Styles from the Tour Builder menu
- On the Font Style Library screen:
- Choose Library > Delete Unused Font Styles
This will delete all font styles that are not used by markers or tooltips.
Learn about Font Styles
How to duplicate a font style
Making a copy is a good way to customize a font style without modifying the original.
- Choose Library > Font Styles from the Tour Builder menu
- On the Font Style Library screen:
- Click the name or image of the font style you want to duplicate
- Choose Library > Duplicate from the menu
Learn about Font Styles
How to edit a font style
- Choose Library > Font Styles from the Tour Builder menu
- On the Font Style Library screen:
- Click the name or image of the font style you want to edit
You can also edit a font style directly by clicking the Edit link next to the Font dropdown on the Edit Tooltip Style or Edit Marker screen.
Learn about Font Styles
How to see which markers and tooltips are using a font style
- Choose Library > Font Styles from the Tour Builder menu
- On the Font Style Library screen:
- Click Show Details View
- The details view displays the number of uses to the left of the symbol preview, or "Not used"
- Click the link to see which markers and tooltips are using the font style
Learn about Font Styles
How to set the font style for a Photo Marker or Text Marker
- Choose Library > Markers from the Tour Builder menu
- On the Marker Library screen:
- Select a photo marker or text marker from the list
- On the Edit Marker screen:
- Select the font style from the Font dropdown
A Photo Marker must have a Photo Caption in order to assign a font style because the font style applies to the caption.
Learn about Font Styles
How to set the font style for a Tooltip style
- Choose Library > Tooltip Styles from the Tour Builder menu
- On the Tooltip Style Library screen:
- Select the tooltip style name from the list
- On the Edit Tooltip Style screen:
- Select the font style from the Font dropdown
Learn about Font Styles
Galleries
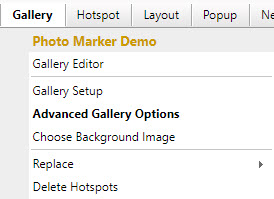
Gallery menu
The Gallery menu is only enabled when a gallery page is selected in the Tour Navigator.
Learn about Galleries
How to add a gallery to a tour
- Choose New > Gallery from the Tour Builder menu
- On the New Gallery Setup screen:
- Give the gallery a name or accept the default
- Choose a Popup or Tiled layout
- Click the Add Gallery button
Learn about Galleries
How to add an image to a gallery
- Choose New > Hotspot from the Tour Builder Menu
- On the Edit Hotspot Content screen:
- Choose a Photo Marker from the Marker dropdown
- Choose and load an image
Learn about Galleries
How to delete a gallery
- Choose Gallery > Delete from the Tour Builder menu
- Click OK on the confirmation dialog. This step displays a second confirmation dialog asking if you are sure you want to delete the gallery.
- Click OK on the second confirmation dialog. The gallery is deleted from your account.
Caution
A deleted map, gallery, or data sheet, along with its hotspots, cannot be recovered. It is permanently removed from our database and cannot be restored.
Learn about Galleries
How to delete multiple images from a gallery
- Choose Gallery > Delete Hotspots from the Tour Builder Menu
- On the Delete Hotspots screen:
- Check the images you want to delete
- Click the Delete button
- On the confirmation dialog, click the DELETE button
Learn about Galleries
How to get the highest image quality for hotspots
For the highest image quality, upload or import jpg images having the same dimensions as your tour's tiled or popup layout image area. For example, if the image area is 600 x 400, upload images that are 600 x 400. When you do this, the image MapsAlive displays will be identical to what you uploaded and its EXIF data such as a copyright notice will be preserved. If you upload an image having much larger dimensions, MapsAlive may scale the image to fit. Due to the nature of jpg images which degrade a little bit every time they are saved, a scaled image may not look quite as good as the original nor will its EXIF data be preserved.
Learn about Galleries
How to make a repeating gallery background image
- Choose Gallery > Gallery Editor from the Tour Builder Menu
- On the Gallery Editor screen:
- Select Repeat from the Background Image dropdown
Learn about Galleries
How to replace the photo marker for every image in a gallery
- Choose Gallery > Replace > Markers from the Tour Builder Menu
- On the Replace Markers screen:
- Choose a new marker from the list
- Click the Check All link
- Click the Replace button (there is no confirmation dialog)
Learn about Galleries
How to upload a gallery background image
- Choose Gallery > Choose Background Image from the Tour Builder Menu
- On the Choose Background Image screen:
- Choose an image file and then click the Load button
Learn about Galleries
Help
How show the help panel when the tour loads
You can display the help panel using JavaScript by calling the showHelpPanel API method. Use the code below to show the panel when the page loads.
function onEventPageLoaded(event) {
   event.api.showHelpPanel(event.page.id);
}
If you only want to open the panel on desktop browsers but not on mobile browsers, use the code below.
function onEventPageLoaded(event) {
   if (!event.api.isSmallMobileDevice)
      event.api.showHelpPanel(event.page.id);
}
Learn about Help
How to provide help for a map or gallery page
- Choose Map > Advanced Map Options from the Tour Builder menu
- On the Advanced Map Options screen:
- Check the Show Help for this Map box
- Fill in the fields
- Choose Gallery > Advanced Gallery Options from the Tour Builder menu
- On the Advanced Gallery Options screen:
- Check the Show Help for this Gallery box
- Fill in the fields
Learn about Help
How to style the help panel
You can use the CSS below to set the location of the top of the help panel. You can also style the panel's border, padding, background transparancy. Below is an example of CSS code in the CSS field on the Custom HMTL screen that positions the top of the help panel and defines its border.
#maHelpPanel {
   top: 220px;
   border:solid 3px #4b4c2d;
}
!important rule as shown in the the example below.
#maHelpPanel {
    left: 30px !important;
    background-color: rgba(255, 243, 193, 0.7) !important;
}
Learn about Help
Hotspots
How to add a new hotspot
![]()
- Click the add hotspot icon (see red arrow above) or choose New > Hotspot from the Tour Builder menu
- The Edit Hotspot Content screen displays for the new hotspot
Tip: You can click the add hotspot icon multiple times to quickly create several hotspots.
Learn about Hotspots
How to delete a hotspot
- Select the hotspot from the Tour Navigator on the left
- Choose Hotspot > Delete from the Tour Builder menu
- Click the DELETE button on the confirmation dialog
Caution
A deleted hotspot cannot be recovered. It is permanently removed from our database and cannot be restored.
Learn about Hotspots
How to delete multiple hotspots at the same time
To delete hotspots from a map:
- Choose Map > Delete Hotspots from the Tour Builder menu
To delete hotspots from a gallery:
- Choose Gallery > Delete Hotspots from the Tour Builder menu
Then, on the Delete Hotspots screen:
- Check the hotspots you want to delete
- Click the Delete button
- Click the DELETE button on the confirmation dialog
Caution
Deleted hotspots cannot be recovered. They are permanently removed from our database and cannot be restored.
Learn about Hotspots
How to display a video, web page, or Google map in a hotspot's content
You can embed a video, HTML document or web page, or Google map in your hotspot content by pasting the HTML embed code directly into your hotspot’s content.
- Choose Hotspot > Edit Hotspot Content from the Tour Builder menu
- On the Edit Hotspot Content screen:
- Choose Multimedia from the Media dropdown. This step changes the hotspot content type from Photo to Multimedia and displays the Multimedia field. Note that changing the hotspot type to Multimedia removes the hotspot's photo if any.
- Paste the HTML embed code for your video or other multimedia into the Multimedia field and choose Save
Videos must already be hosted on a server somewhere such as YouTube or your own server. You cannot upload a video directly to MapsAlive. You can paste HTML for one
<iframe>or one<video>tag. You cannot use any other HTML tags in the Multimedia field and you can only include one complete tag per hotspot. Any HTML that appears after the closing tag for one of the supported tags is automatically truncated.
Learn about Hotspots
How to edit a hotspot
- Choose Hotspot > Edit Hotspot Content from the Tour Builder menu
Learn about Hotspots
How to edit the HTML for a hotspot's text content
- Choose Hotspot > Edit Hotspot Content from the Tour Builder menu
- On the Edit Hotspot Content screen:
- Click the Source code icon
<>on the right of the Text editor menu - Edit your HTML and click Save
- Click the Source code icon
Learn about Hotspots
How to find a hotspot on the map
There are three ways to locate a hotspot on the map:
-
From the Edit Hotspot Content screen:
- Click Locate this hotspot on the map
-
From the Map Editor screen
- Click the hotspot's thumbnail in the Hotspot Thumbnails section that appears below the map
-
From the Map Editor screen
- Choose the hotspot's title from the hotspot dropdown list
Learn about Hotspots
How to place a hotspot on the map
There are three ways to place a hotspot on the map:
-
From the Edit Hotspot Content screen:
- Click Place this hotspot on the map
-
From the Map Editor screen:
- Click the hotspot's thumbnail in the Hotspot Thumbnails section that appears below the map
-
From the Map Editor screen:
- Choose the hotspot's title from the hotspot dropdown list
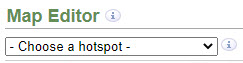
Hotspot Dropdown List
Learn about Hotspots
How to set a hotspot's id
- Choose Hotspot > Edit Hotspot Content in the Tour Builder menu
- On the Edit Hotspot Content screen:
- Type the new id in the Hotspot Id field
Learn about Hotspots
How to set the first hotspot that displays when a map loads
- Choose Map > Map Setup from the menu
- On the Map Setup screen:
- Choose the hotspot from the First Hotspot dropdown
Learn about Hotspots
Layouts
How to adjust data sheet splitters
- Choose Layout > Splitters from the Tour Builder menu
- On the Splitters screen:
- Drag the horizontal and vertical sliders
Learn about Layouts
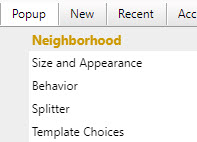
How to adjust the popup splitters
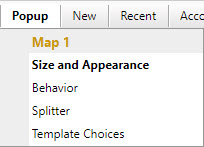
- Choose Popup Splitter from the Tour Builder menu
- On the Popup Splitter screen:
- Drag the horizontal or vertical slider
Learn about Layouts
How to adjust the tiled page layout splitters
- Choose Layout > Splitters from the Tour Builder menu
- On the Splitters screen:
- Drag the horizontal and vertical sliders
Learn about Layouts
How to choose a data sheet template
- Choose Layout > Template Choices from the Tour Builder menu
- On the Template Choices screen:
- Click a template thumbnail
Learn about Layouts
How to choose a popup template
- Choose Popup > Template Choices from the Tour Builder menu
- On the Popup Template Choices screen:
- Click a template thumbnail
Learn about Layouts
How to choose a tiled page template
- Choose Layout > Template Choices from the Tour Builder menu
- On the Template Choices screen:
- Click a template thumbnail
Learn about Layouts
How to make a map or gallery use a tiled page layout
To use a tiled page layout for a map:
- Choose Map > Setup from the Tour Builder menu
- On the Map Setup screen:
- Click the Tiled radio button
Note: You cannot choose a tiled page layout for Flex maps.
To use a tiled page layout for a gallery:
- Choose Gallery > Setup from the Tour Builder menu
- On the Gallery Setup screen:
- Click the Tiled radio button
Learn about Layouts
How to override the size of a specific popup
- Click the hotspot name in the Tour Navigator
- Choose Hotspot > Advanced Hotspot Options from the Tour Builder menu
- On the Advanced Hotspot Options screen:
- Set the exact width and/or height for the popup
Learn about Layouts
How to set data sheet margins and spacing
- Choose Layout > Margins and Spacing from the Tour Builder menu
- On the Margins and Spacing screen:
- Type margin values in pixels in the Margins fields
- Type spacing values in pixels in the Spacing fields
Learn about Layouts
How to set map margins for popup layouts
- Choose Layout > Map Margins from the Tour Builder menu
- On the Map Margins screen:
- Type margin values in pixels in the Margins fields
Learn about Layouts
How to set popup margins and spacing
- Choose Popup > Popup Size and Appearance from the Tour Builder menu
- On the Popup Size and Appearance screen:
- Type margin values in pixels in the Margins fields
- Type a spacing value in pixels in the Spacing field
Learn about Layouts
How to set the popup background transparency (opacity)
You can control the opacity of a popup's background with the CSS shown below:
#maPopupPanel {
   background-color: rgba(255,255,255,0.65);
}
#maPopupTitle, #maPopupText {
   background-color: rgba(255,255,255, 0.0);
}
The CSS sets the popup's background color to white with 65% opacity. It sets the background color of the title and text to white with 0% opacity. You can of course choose any color and opacity you like. You can add the CSS in your tour in the CSS field on the Custom HMTL screen.
Learn about Layouts
How to set the popup size and appearance
- Choose Popup > Popup Size and Appearance from the Tour Builder menu
- On the Popup Size and Appearance screen:
- Customize the size and appearance settings
Learn about Layouts
How to set the tour size for a Classic tour
- Choose Layout > Advanced Tour Layout from the Tour Builder menu
- On the Advanced Tour Layout screen:
- Enter the width and height for the tour when displayed in a browser
Learn about Layouts
How to set tiled page layout margins and spacing
- Choose Layout > Margins and Spacing from the Tour Builder menu
- On the Margins and Spacing screen:
- Type margin values in pixels in the Margins fields
- Type spacing values in pixels in the Spacing fields
Learn about Layouts
How to use popups for a map or gallery
To use popups for a map:
- Choose Map > Setup from the Tour Builder menu
- On the Map Setup screen:
- Click the Popup radio button
To use popups for a gallery:
- Choose Gallery > Setup from the Tour Builder menu
- On the Gallery Setup screen:
- Click the Popup radio button
Learn about Layouts
Maps
What is the maximum allowed size for a map image
The maximum size is 4096 x 4096. If you upload a larger image, MapsAlive will scale it to this maximum size.
Learn about Maps
What map image file formats are supported
MapsAlive supports these file formats for a map image: jpeg, png, gif
Learn about Maps
How to add a map page to a tour
- Choose New > Map from the Tour Builder menu
- On the New Flex Map Setup or New Map Setup screen:
- Give the map a name or accept the default
- Choose a Popup or Tiled layout for this map's hotspot content
- Click Add Map
TIP: If your new map is similar to another map in your tour, choose the Copy settings from another map in this tour option. You can choose which map to copy, and everything but the map image will be copied to your new map.
Learn about Maps
How to delete a map page from a tour
Do one of the following:
- Choose Tour > Tour Manager from the Tour Builder menu, and then click the trash can icon under the map’s thumbnail image.
-
Choose Map > Delete from the menu to delete the currently selected Map.
- Click OK on the confirmation dialog. This step displays a second confirmation dialog asking if you really want to delete the map.
- Click OK on the second confirmation dialog. The map and all of its hotspots is deleted from the tour.
Caution
A deleted map, gallery, or data sheet, along with its hotspots, cannot be recovered. It is permanently removed from our database and cannot be restored.
Learn about Maps
How to have a map page with no map image
You can use MapsAlive to create an interactive map with no map, just a background. To do this, simply don't upload a map image, though if you like, you can set a background color using the Map Background Color option on the Advanced Map Options screen. You can add hotspots and place them on the map background using the Map Editor just as you would if there were a map image.
Learn about Maps
How to remove or replace the map image on a map page
- Choose Map > Choose Map Image from the menu
- On the Choose Map Image screen you can either upload a different image or remove the current image
Learn about Maps
How to see the dimensions of a map image I already uploaded
- Choose Map > Choose Map Image from the Tour Builder menu
- On the Choose Map Image screen:
- The dimensions of the currently uploaded map appear below the map image
Learn about Maps
How to set the first hotspot that displays when a map page loads
- Choose Map > Map Setup from the menu
- On the Map Setup screen:
- Choose the hotspot from the First Hotspot dropdown
Learn about Maps
How to upload map image to a map page
- Choose Map > Choose Map Image from the menu
- On the Choose Map Image screen:
- Click Choose File
- Choose a new map image from your computer and click Open
- Click Load
Learn about Maps
MapZoom
How to control map image sharpening
- Choose Map > Advanced Map Options from the Tour Builder menu
- On the Advanced Map Options screen:
- Select an option form the Map Image Sharpening dropdown
Learn about MapZoom
How to disable map zooming
You disable zooming by not enabling it.
- Choose Map > Advanced Map Options from the Tour Builder menu
- On the Advanced Map Options screen:
- Uncheck the Enable MapZoom option
When you disable MapZoom, the zoom controls and map inset will not appear and you will not be able to zoom the map using the mouse wheel or pinch gesture. The map will be displayed zoomed all the way out.
Learn about MapZoom
How to hide a map's zoom controls, but still allow zooming
You can hide the zoom controls with the CSS shown below:
#maZoomInControl, #maZoomOutControl {
   display: none;
}
When you hide the controls using CSS, you can still zoom the map using the mouse wheel or the pinch gesture.
Learn about MapZoom
How to set the color of the map zoom controls
- Choose Map > Advanced Map Options from the Tour Builder menu
- On the Advanced Map Options screen:
- Choose a color for the Zoom Controls Color option
Learn about MapZoom
How to set the map inset location, size, and overlay color
- Choose Map > Advanced Map Options from the Tour Builder menu
- On the Advanced Map Options screen:
- To change the location of the map inset choose an option from the Inset Location dropdown
- To change the size of the inset enter a value in the Inset Size text box
- To change the overlay color choose a color from the Inset Highlight Color option
Learn about MapZoom
Marker Actions
How to control if hotspot content is shown on mouseover, on click, or never
- Choose Hotspot > Marker Actions from the Tour Builder menu
- On the Marker Actions screen:
- To show content on mouseover, select Mouse moves over marker
- To show content on click, select Marker is clicked
- To never show content, select Never
The default is to show content on mouseover.
Learn about Marker Actions
How to execute JavaScript on click, or mouseover, or mouseout
- Choose Hotspot > Hotspot Actions from the Tour Builder menu
- On the Hotspot Actions screen:
- Choose Execute JavaScript from the Click Action, Mouseover Action, or Mouseout Action dropdown
- Type the JavaScript code you want to execute in the text box that opens
Learn about Marker Actions
How to link to another page in your tour
- Choose Hotspot > Marker Actions from the Tour Builder menu
- On the Marker Actions_ screen:
- Choose Go to Page from the Click Action dropdown
- Select the page name from the dropdown
The Go to Page option is not shown for single page tours.
Learn about Marker Actions
How to link to another web page on click
- Choose Hotspot > Hotspot Actions from the Tour Builder menu
- On the Hotspot Actions screen:
- Choose Link to URL from the Click Action dropdown
- Type the URL in the text box that opens
- Optionally, choose whether to open the web page in a new window
Learn about Marker Actions
Marker Attributes
How to disable a marker so that it does not respond to mouseover, mouseout, and click events
- Choose Hotspot > Advanced Hotspot Options from the Tour Builder menu
- On the Advanced Hotspot Options screen:
- Check the Is Static marker attribute
You can dynamically disable or enable a marker by using the API to call the setMarkerDisabled method.
Learn about Marker Attributes
How to hide a marker that is on the map
- Choose Hotspot > Advanced Hotspot Options from the Tour Builder menu
- On the Advanced Hotspot Options screen:
- Check the Is Hidden marker attribute
You can dynamically hide or show a marker by using the API to call the setMarkerHidden method.
Learn about Marker Attributes
How to make a marker float over the map by not being anchored to the map
- Choose Hotspot > Advanced Hotspot Options from the Tour Builder menu
- On the Advanced Hotspot Options screen:
- Check the Is Not Anchored to Map marker attribute
Learn about Marker Attributes
How to set prevent a marker from changing its appearance from normal to selected
- Choose Hotspot > Advanced Hotspot Options from the Tour Builder menu
- On the Advanced Hotspot Options screen:
- Check the Is Static marker attribute
Learn about Marker Attributes
Marker Effects
How to add an effect to a marker style
Learn about Marker Effects
Marker Styles
How to apply a marker style to a marker
- Choose Library > Markers from the Tour Builder menu
- On the Marker Library screen:
- Select the marker name to which you want to apply the style
- On the Edit Marker screen:
- Select the marker style from the Marker Style dropdown
You can only assign a marker style to a shape, text, or photo marker. Symbol markers do not have marker styles.
Learn about Marker Styles
How to create a marker style
- Choose New > Resource > Marker Style in the Tour Builder menu
- On the Edit Marker Style screen:
- Give the marker style a name
- Set the Line Thickness to define a border for the marker's style or choose '0' for no border
- Set the style attributes for the normal appearance
- Set the style attributes for the selected appearance
Learn about Marker Styles
How to delete a marker style
- Choose Library > Marker Styles in the Tour Builder menu
- On the Marker Style Library screen:
- Click the name or image of the marker style you want to delete
- Choose Library > Delete from the menu
You cannot delete a marker style that is used by a marker.
Learn about Marker Styles
How to delete all unused marker styles from your account
- Choose Library > Marker Styles from the Tour Builder menu
- On the Marker Style Library screen:
- Choose Library > Delete Unused Marker Styles
This will delete all marker styles that are not used by markers.
Learn about Marker Styles
How to duplicate a marker style
Making a copy is a good way to customize a marker style without modifying the original.
- Choose Library > Marker Styles from the Tour Builder menu
- On the Marker Style Library screen:
- Select the name of the marker style you want to duplicate
- Choose Library > Duplicate from the menu
Learn about Marker Styles
How to edit a marker style
- Choose Library > Marker Styles in the Tour Builder menu
- On the Marker Style Library screen:
- Click the name or image of the marker style you want to edit
Learn about Marker Styles
How to replace multiple marker styles at once
- Choose Map > Replace > Marker Styles from the Tour Builder menu
- On the Replace Marker Styles screen:
- Select a new style from the New Marker Style dropdown
- Check the box next to the hotspots for which you want to replace the marker style
- Click Replace
Only those hotspots that use shape markers, text markers, or photo markers are displayed in the list.
The Replace Marker Styles feature is included in the Plus and Pro Plans.
Learn about Marker Styles
How to see all the marker styles in your account
- Choose Library > Marker Styles in the Tour Builder menu
Learn about Marker Styles
How to see which markers are using a marker style
- Choose Library > Marker Styles from the Tour Builder menu
- On the Marker Style Library screen:
- Click Show Details View
- The details view displays the number of uses to the left of the marker style preview, or "Not used"
- Click the link to see which markers are using the marker style
Learn about Marker Styles
Marker Zooming
How to set a marker's zoom visibility threshold
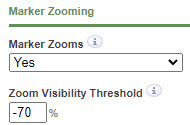
- Choose Map > Advanced Map Options from the Tour Builder menu
- On the Advanced Map Options screen:
- Enter a percentage value in the Zoom Visibility Threshold field
- Use a positive value to show the marker when the map is zoomed above the threshold
- Use a negative value to show the marker when the map is zoomed at or below the threshold
To help you determine what percentage to use for the threshold, the Map Editor displays the zoom level in its control panel as shown below.

Learn about Marker Zooming
How to set a specific marker to zoom
- Choose Hotspot > Advanced Hotspot Options from the Tour Builder menu
- On the Advanced Hotspot Options screen:
- Choose Yes from the Marker Zooms dropdown
Learn about Marker Zooming
How to set all markers on a map to zoom
- Choose Map > Advanced Map Options from the Tour Builder menu
- On the Advanced Map Options screen:
- Check or uncheck Markers Zoom
Learn about Marker Zooming
How to set the Markers Zoom default
- Choose Account > Preferences from the Tour Builder menu
- On the Preferences screen:
- Check or uncheck Markers Zoom Default
The setting will be used whenever you create a new map.
Learn about Marker Zooming
Markers
How to create a new marker
- Choose New > Resource > Marker from the Tour Builder menu
For more information about creating specific kinds of markers, see the individual marker pages.
Learn about Markers
How to delete a marker
- Choose Library > Markers from the Tour Builder menu
- On the Marker Library screen:
- Click the name or image of the marker you want to delete
- Choose Library > Delete from the menu
You cannot delete a marker that is used by any hotspots in your account.
Learn about Markers
How to delete all unused markers from your account
- Choose Library > Markers from the Tour Builder menu
- On the Marker Library screen:
- Choose Library > Delete Unused Markers
This will delete all markers that are not used by any hotspots.
Learn about Markers
How to duplicate a marker
Making a copy is a good way to customize a marker without modifying the original.
- Choose Library > Markers from the Tour Builder menu
- On the Marker Library screen:
- Click the name or image of the marker you want to duplicate
- Choose Library > Duplicate from the menu
Learn about Markers
How to edit a marker
- Choose Library > Markers from the Tour Builder menu
- On the Marker Library screen:
- Click the name or image of the marker you want to edit
You can also edit a hotspot's marker directly by clicking the Edit link next to the Marker dropdown on the Edit Hotspot Content screen.
Learn about Markers
How to filter markers to see only the ones used by the current tour
- Choose Library > Markers from the Tour Builder menu
- Then, choose Library > Filter Markers from the menu
Uncheck Filter Markers to stop filtering. Also, note that bound markers only appear on the Marker Library screen when you choose to filter markers.
Learn about Markers
How to place a hotspot on a map
See How to place a hotspot on the map in the Hotspot Content section
Learn about Markers
How to preview a marker on the Edit Marker screen
- Choose Library > Markers from the Tour Builder menu
- On the Marker Library screen:
- Click the name or image of the marker you want to preview
- On the Edit Marker screen:
- If you have modified the marker, click Save
- Move your mouse over and off the marker in the preview area in the upper right
Learn about Markers
How to replace multiple markers at once
- Choose Map > Replace > Markers or Styles > Markers from the Tour Builder menu
- On the Replace Markers screen:
- Choose a new marker from the New Marker dropdown
- Check the box next to the hotspots for which you want to replace the marker
- Click Replace
The Replace Markers feature is included in the Plus and Pro Plans.
Learn about Markers
How to see all the markers in your MapsAlive account
- Choose Library > Markers from the Tour Builder menu
Learn about Markers
How to see which hotspots are using a marker
- Choose Library > Markers from the Tour Builder menu
- On the Marker Library screen:
- Click Show Details View
- The details view displays the number of uses to the left of the marker preview, or "Not used"
- Click the link to see which hotspots are using the marker
Learn about Markers
How to set a marker for a hotspot
- Choose Hotspot > Edit Hotspot Content from the Tour Builder menu
- On the Edit Hotspot Content screen
- Choose a marker name from the Marker dropdown
Learn about Markers
How to set the default marker
- Choose Account > Preferences from the Tour Builder menu
- On the Preferences screen:
- Choose a marker from the Default Marker dropdown
Learn about Markers
Menus
How to hide the menu
- Choose Tour > Directory Options from the Tour Builder menu
- On the Directory Options screen:
- Uncheck the Show Menu option
Learn about Menus
How to set menu colors
You specify menu colors by editing the tour's color scheme fields shown below:

Learn about Menus
Navigation
How to customize the location of the Nav button
- Choose Layout > Advanced Tour Layout from the Tour Builder menu
- On the Advanced Tour Layout screen:
- Set the X and Y values for the Button Offsets option
The button offsets have no effect when the nav button is located in the title bar.
Learn about Navigation
How to exclude a page from navigation
To prevent a map from appearing on the nav panel:
- Choose Map > Advanced Map Options from the Tour Builder menu
- On the Advanced Map Options screen:
- Check the Exclude From Navigation option
To prevent a gallery from appearing on the nav panel:
- Choose Gallery > Advanced Gallery Options from the Tour Builder menu
- On the Advanced Gallery Options screen:
- Check the Exclude From Navigation option
To prevent a data sheet from appearing on the nav panel:
- Choose Data Sheet > Advanced Data Sheet Options from the Tour Builder menu
- On the Advanced Data Sheet Options screen:
- Check the Exclude From Navigation option
Learn about Navigation
How to hide the Nav button
You can hide the Nav button if you don't want to provide any navigation.
- Choose Layout > Advanced Tour Layout from the Tour Builder menu
- On the Advanced Tour Layout screen:
- Check the Hide Nav Button box
Learn about Navigation
How to set the location of the Nav button
- Choose Layout > Advanced Tour Layout from the Tour Builder menu
- On the Advanced Tour Layout screen:
- Choose a location from the Nav Button Location dropdown
Learn about Navigation
Photo Markers
How to create a photo marker
- Choose New > Resource > Marker from the Tour Builder menu
- On the Edit Marker screen:
- Give the marker a name
- Choose Photo from the Marker Type dropdown
- Choose a marker style from the Marker Style dropdown
- Set additional options
Learn about Photo Markers
How to edit a photo marker
- Choose Libary > Marker from the Tour Builder menu
- On the Marker Library screen:
- Click the name or image of the marker you want to edit
Learn about Photo Markers
How to use multimedia content with a photo marker
A photo marker uses its hotspot's image for the photo, but what if the hotspot uses multimedia content like video? The Edit Hotspot Content screen only lets you choose media or multimedia for the hotspot, but here's how you can use a photo for the marker and still have the hotspot content be multimedia.
- Go to the Edit Hotspot Content screen for the hotspot you are interested in
- Make sure a photo marker is selected in the Marker dropdown.
- Chose Photo from the Media dropdown
- Upload the photo you want for the marker
- Choose Multimedia from the Media dropdown and click OK on the warning dialog
- Paste the embed code into the Multimedia text area
MapsAlive will use the photo you uploaded in step 4 as the marker image. When you mouse over that marker, the multimedia content you provide in step 6 will display. To change the image for a photo marker that is being used with multimedia content, repeat all of the steps above.
Learn about Photo Markers
Popup Behavior
Popup menu
The Popup menu item is only available when you have selected a page in the Tour Navigator that uses popups.
Learn about Popup Behavior
How to adjust the offset from the popup to its marker
- Choose Popup > Popup Behavior from the Tour Builder menu
- On the Popup Behavior screen:
- Increase or decrease the pixel value in the Popup Offset field
Learn about Popup Behavior
How to control the popup location
- Choose Popup > Popup Behavior from the Tour Builder menu
- On the Popup Behavior screen:
- Choose an option from the Popup Location section
Learn about Popup Behavior
How to control whether popups are pinned when their markers are clicked
- Choose Popup > Popup Behavior from the Tour Builder menu
- On the Popup Behavior screen:
- Check or uncheck the Pin Popup When Marker Clicked box
Learn about Popup Behavior
How to delay when popups close on mouseout
- Choose Popup > Popup Behavior from the Tour Builder menu
- On the Popup Behavior screen:
- Choose Close popup after delay from the Delay dropdown
- Type a delay value in milliseconds
A delay value of 500 ms to 1000 ms is a good starting point, but you can experiment to see what works best for your map.
Learn about Popup Behavior
How to delay when popups display on mouseover
- Choose Popup > Popup Behavior from the Tour Builder menu
- On the Popup Behavior screen:
- Choose Delay before showing popup from the Delay dropdown
- Type a delay value in milliseconds
A delay value of 100 ms to 200 ms is a good starting point, but you can experiment to see what works best for your map.
Learn about Popup Behavior
How to set the length of the popup callout
- Choose Popup > Popup Behavior from the Tour Builder menu
- On the Popup Behavior screen:
- Choose a length from the Callout dropdown
Learn about Popup Behavior
Routes
How to create a route hotspot
- Select the hotspot to be used for the route from the Tour Navigator
- Choose Hotspot > Advanced Hotspot Options from the Tour Builder menu
- On the Advanced Hotspot Options screen:
- Check the Is Route option
To draw a route, at least one hotspot on your map must have its Is Route attribute set.
Learn about Routes
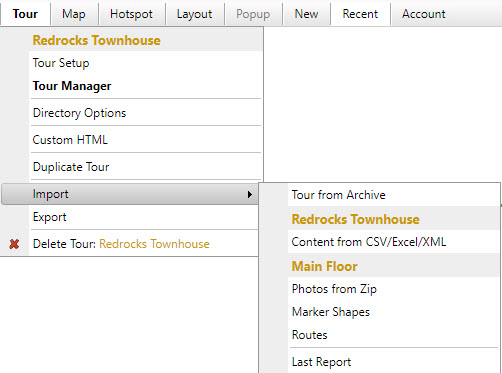
How to import routes from a CSV file or Excel spreadsheet
- Choose Tour > Import Routes from the Tour Builder menu
- On the Import Routes screen:
- Browse for the spreadsheet file containing the routes
- Click the Import button
During the import process, MapsAlive resolves each Id it encounters by comparing it to the Hotspot Ids present in the tour. If a route references a Hotspot Id that does not exist, MapsAlive will report an error and reject any routes that use that Hotspot Id.
Learn about Routes
Shape Markers
How to create a circle or rectangle shape marker using the Edit Marker screen
- Choose New > Resource > Marker from the Tour Builder menu
- On the Edit Marker screen:
- Give the marker a name
- Choose Shape from the Marker Type dropdown
- Choose Circle or Rectangle from the Shape dropdown
- Choose a marker style from the Marker Style dropdown or click the New link to create a new marker style
- Specify the circle radius or the rectangle dimensions
Learn about Shape Markers
How to create and edit shape and hybrid markers
You can create and edit both shape and hybrid markers using the Map Editor (requires a Plus or Pro Plan). To learn how, see the sections on Creating Shape Markers and Creating Hybrid Markers.
Learn about Shape Markers
How to edit a shape marker using the Edit Marker screen
- Choose Library > Markers from the Tour Builder menu
- On the Marker Library screen:
- Click the name of the marker you want to edit
You can also edit the shape marker by clicking the Edit link next to the Marker dropdown on the Edit Hotspot Content screen.
Learn about Shape Markers
How to import marker shapes
- In the Tour Navigator choose the map that you want to import shapes
- Choose Tour > Import > Marker Shapes from the Tour Builder menu
- On the Import Marker Shapes screen:
- Select a marker style from the Marker Style dropdown
- Click Choose File and browse for the file on your computer that contains your marker shape definitions
- Click Import Learn about Shape Markers
How to use a number, letter, or symbol that is already on my map image as a marker
You can take advantage of numbers, letters, and symbols that are already on your map image by creating a shape marker and then placing it over the number, letter, or symbol on the map in MapsAlive.
- Choose New > Resource > Marker from the Tour Builder menu
- On the Edit Marker screen:
- Choose Shape from the Marker Type dropdown
- Choose Rectangle or Circle from the Shape dropdown. For rectangles, you can set the width and height and for circles, you can set the radius.
- Choose a marker style from the Marker Style dropdown to define the normal and selected marker appearance. To see the map image under the marker, use a marker style that uses blend mode or reduce the opacity. Another option is to use a transparent marker style for the normal marker appearance.
Now you can associate your new marker with a hotspot and place the marker over the number, letter, or symbol on your map image.
Learn about Shape Markers
Slideshow
How to display hotspot content as a slideshow
- Click Map > Advanced Map Options in the menu
- On the Advanced Map Options screen:
- Check the Run Slide Show When Map Loads checkbox
When the box is checked, the content for each hotspot on the map displays for the number of seconds you choose from the dropdown. The slide show stops automatically when you mouse over a marker.
Learn about Slideshow
How to set the order of hotspots in a slideshow
- Choose Map > Advanced Map Options from the menu
- On the Advanced Map Options screen:
- Use the Hotspot Order list to move hotspots up or down in the list to order them the way you want
Learn about Slideshow
Symbol Markers
How to create a symbol marker that does not change appearance
Choose the same symbol from the Normal Symbol and Selected Symbol dropdowns, or choose No Symbol from the Selected Symbol dropdown on the Edit Marker screen.
Learn about Symbol Markers
How to create a symbol marker that only appears when the hotspot is selected
If you don’t want to clutter your map with symbols, but you want a symbol to appear when the mouse moves over a hotspot, choose No Symbol from the Normal Symbol dropdown on the Edit Marker screen.
Learn about Symbol Markers
How to create a symbol marker
- Choose New > Resource > Marker from the Tour Builder menu
- On the Edit Marker screen:
- Choose a marker name
- Choose Symbol from the Marker Type dropdown
- Choose a normal symbol from the Normal Symbol dropdown
- Choose a selected symbol from the Selected Symbol dropdown
Your new marker is now ready to use for a hotspot. It will appear in the Marker dropdown the next time you go to the Edit Hotspot Content screen.
Learn about Symbol Markers
How to edit a symbol image
- Choose Library > Symbols in the Tour Builder menu
- On the Symbol Library screen:
- Click the name or image of the symbol whose image you want to edit
Learn about Symbol Markers
How to replace a symbol image
- Choose Library > Symbols in the Tour Builder menu
- On the Symbol Library screen:
- Click the name or image of the symbol whose image you want to replace
- Upload a new image
When you replace a symbol image, all markers that use that symbol will be updated automatically.
Learn about Symbol Markers
How to see all the symbols in your account
- Choose Library > Symbols in the Tour Builder menu
Learn about Symbol Markers
How to see which markers are using a symbol
- Choose Library > Symbols from the Tour Builder menu
- On the Symbol Library screen:
- Click Show Details View
- The details view displays the number of uses to the left of the symbol preview, or "Not used"
- Click the link to see which markers are using the symbol
Learn about Symbol Markers
How to set the anchor location of a symbol marker
The anchor location defines the point around which a marker will rotate. By default, a symbol marker is anchored in the center of the symbol, but you can change the anchor location. For example, if you have a pin marker you might want the anchor location to be the tip of the pin. That way, if you rotate the pin marker on the map, it will rotate around the tip of the pin rather than the center.
- Choose Library > Markers from the Tour Builder menu
- On the Marker Library screen:
- Click the name or image of the marker you want to edit
- On the Edit Marker screen:
- Choose Off Center from the Anchor Location dropdown
- Enter values for X and Y
Learn about Symbol Markers
How to upload symbols to use for markers
- Choose New > Resource > Symbol from the Tour Builder menu
- On the Add Symbol screen:
- Type a symbol name
- Click Choose File
- Select the symbol file from your computer
- Click Open on the dialog
- Click Load
Once you upload a symbol into your account it will be available in the symbol dropdown lists on the Edit Marker screen. Remember that to use a symbol as a marker you have to create a marker that uses your new symbol.
Learn about Symbol Markers
Symbol + Shape Markers
How to convert an existing polygon, line, or hybrid shape marker into a symbol + shape marker
- Choose Library > Markers from the Tour Builder menu
- On the Marker Library screen:
- Click the name of the shape marker you want to convert
- On the Edit Marker screen:
- Choose Symbol + Shape from the Marker Type dropdown
Important: You cannot create a new symbol + shape marker that uses a polygon, line, or hybrid shape in MapsAlive. Currently, to create a polygon, line, or hybrid shape you must edit the coordinates outside of MapsAlive and re-import the shapes. See Importing Marker Shapes for more information.
Learn about Symbol + Shape Markers
How to create a symbol + shape marker
- Choose New > Resource > Marker from the Tour Builder menu
- On the Edit Marker screen:
- Give the marker a name
- Choose Symbol + Shape from the Marker Type dropdown
- Choose Circle or Rectangle from the Shape dropdown
- Choose a marker style from the Marker Style dropdown or click the New link to create a new marker style
- Select a symbol from the Normal Symbol dropdown
- Select a symbol from the Selected Symbol dropdown
- Specify the circle radius or the rectangle dimensions
- Set the symbol location within the shape
Learn about Symbol + Shape Markers
How to edit a symbol + shape marker
- Choose Library > Markers from the Tour Builder menu
- On the Marker Library screen:
- Click the name of the marker you want to edit
Learn about Symbol + Shape Markers
How to set the location of the symbol within a symbol + shape marker
By default, the symbol is centered within the shape, but you can position it anywhere you like.
- Choose Library > Markers from the Tour Builder menu
- On the Marker Library screen:
- Click the name of the marker you want to edit
- On the Edit Marker screen:
- Choose Positioned at X,Y from the Symbol Location dropdown
- Enter values for X and Y
Learn about Symbol + Shape Markers
Text Markers
How to control the text in a text marker
- Choose Libary > Markers from the Tour Builder menu
- On the Marker Library screen:
- Click the name of the marker you want to edit
- On the Edit Markers screen:
- To use the hotspot title as the text, leave the Text field blank.
- To set the text for all hotspots that use this marker, type the text in the Text field.
- Set additional Text Options
Learn about Text Markers
How to create a text marker
- Choose New > Resource > Marker from the Tour Builder menu
- On the Edit Marker screen:
- Give the marker a name
- Choose Text from the Marker Type dropdown
- Choose Circle or Rectangle from the Shape dropdown
- Choose a marker style from the Marker Style dropdown
- Set Text Colors, Text Options, and Shape Options
Learn about Text Markers
How to edit a text marker
- Choose Libary > Markers from the Tour Builder menu
- On the Marker Library screen:
- Click the name of the marker you want to edit
Learn about Text Markers
Title Bars and Footers
How to add a title bar to a tour
- Choose Layout > Advanced Tour Layout from the Tour Builder menu
- On the Advanced Tour Layout screen
- Check Title Bar in the Layout Options section
Learn about Title Bars and Footers
How to add a tour footer
- Choose Layout > Advanced Tour Layout from the Tour Builder menu
- On the Advanced Tour Layout screen
- Type text in the Footer Text box and optionally add a link to your web site or an email address
Instructions for how to format the footer can be found by mousing over the Quick Help icon next to the Footer Text field on the Advanced Tour Layout screen.
Learn about Title Bars and Footers
How to remove a tour footer
- Choose Layout > Advanced Tour Layout from the Tour Builder menu
- On the Advanced Tour Layout screen
- Remove all text and links from the Footer Text box
Learn about Title Bars and Footers
How to remove the title bar from a tour
- Choose Layout > Advanced Tour Layout from the Tour Builder menu
- On the Advanced Tour Layout screen
- Uncheck Title Bar in the Layout Options section
If the Nav button location is set to Title Bar and you remove the title bar from your tour, MapsAlive will automatically change the Nav Button Location to Above Right.
Learn about Title Bars and Footers
How to set the title bar text and background colors
- Choose Layout > Advanced Tour Layout from the Tour Builder menu
- On the Advanced Tour Layout screen
- Click the Edit link next to the Color Scheme dropdown
Learn about Title Bars and Footers
How to set the title bar text dynamically
Use the setTourTitle method in the API to dynamically change the tour's title text.
Learn about Title Bars and Footers
How to set the title bar text for a page
To set the title bar text for a Map:
- Choose Map > Advanced Map Options from the Tour Builder menu
- On the Advanced Map Options screen: Type the title bar text in the Map Title field
To set the title bar text for a Gallery:
- Choose Gallery > Advanced Gallery Options from the Tour Builder menu
- On the Advanced Gallery Options screen: Type the title bar text in the Gallery Title field
To set the title bar text for a Data Sheet:
- Choose Data Sheet > Edit Data Sheet Content from the Tour Builder menu
- On the Edit Data Sheet Content screen: Type the title bar text in the Data Sheet Title field
Learn about Title Bars and Footers
How to turn off the 'Created with MapsAlive Free Trial' footer
The Free Trial footer displays for tours created with the Trial account.
The footer is removed automatically for all paid plans.
If you still see the Free Trial footer after purchasing a plan, try flushing your browser cache and/or clicking the Rebuild link on the Tour Manager screen.
Learn about Title Bars and Footers
How to turn on or off the header and footer stripes
- Choose Layout > Advanced Tour Layout from the Tour Builder menu
- On the Advanced Tour Layout screen
- Check or uncheck Header Stripe and/or Footer Stripe in the Layout Options section.
Learn about Title Bars and Footers
Tooltips
How to add tooltip text to a hotspot
- Choose Hotspot > Edit Hotspot Content from the Tour Builder menu
- On the Edit Hotspot Content screen:
- Type the tooltip text in the Tooltip field
By default tooltips only display when you are using a tiled layout in a Classic tour, and do not display when you are using popups. Normally tooltips display for hotspots only when you are using a tiled layout and not for hotspots that display popups. If you want to display a tooltip for a hotspot that uses popups check the Show Tooltip When No Hotspot Content box on the Popup Behavior screen.
Learn about Tooltips
How to choose a tooltip style for a map
- Choose Map > Map Setup from the Tour Builder menu
- On the Map Setup screen:
- Choose a new style from the Tooltip Style dropdown
The tooltip style applies to all hotspots on the same map.
Learn about Tooltips
How to create a new tooltip style
- Choose New > Resource > Tooltip Style from the Tour Builder menu
Learn about Tooltips
How to delete a tooltip style
- Choose Library > Tooltip Styles from the Tour Builder menu
- On the Tooltip Style Library screen:
- Click the name or image of the tooltip style you want to delete
- Choose Library > Delete from the menu
You cannot delete a tooltip style that is used by a map.
Learn about Tooltips
How to delete all unused tooltip styles from your account
- Choose Library > Tooltip Styles from the Tour Builder menu
- On the Tooltip Style Library screen:
- Choose Library > Delete Unused Tooltip Styles
This will delete all tooltip styles that are not used by any maps in your account.
Learn about Tooltips
How to duplicate a tooltip style
- Choose Library > Tooltip Styles from the Tour Builder menu
- On the Tooltip Style Library screen:
- Click the name or image of the tooltip style you want to duplicate
- Choose Library > Duplicate from the menu
Learn about Tooltips
How to edit a tooltip style
- Choose Library > Tooltip Styles from the Tour Builder menu
- On the Tooltip Style Library screen:
- Click the name or image of the tooltip style you want to edit
Learn about Tooltips
How to see which maps are using a tooltip style
- Choose Library > Tooltips from the Tour Builder menu
- On the Tooltip Library_ screen:
- Click Show Details View
- The details view displays the number of uses to the left of the tooltip style preview, or "Not used"
- Click the link to see which maps are using the tooltip style
Learn about Tooltips
Tours
How to delete a tour
- Choose Tour > Delete Tour from the Tour Builder menu
- Click OK on the confirmation dialog. This step displays a second confirmation dialog asking if you are sure you want to delete the tour.
- Click OK on the second confirmation dialog. The tour is deleted from your account.
You can also choose Library > Tours from the menu to see a thumbnail view of all your tours and then click the trash can icon below a tour thumbnail to delete a specific tour.
Caution
A deleted tour, along with all of its maps and hotspots, cannot be recovered. It is permanently removed from our database and cannot be restored.
Learn about Tours
How to duplicate a tour
- Choose Tour > Duplicate from the Tour Builder menu
The Duplicate Tour feature is a Pro Plan feature
Learn about Tours
How to rename a tour
- Choose Tour > Tour Setup from the Tour Builder menu
- On the Tour Setup screen:
- Type the new name in the Tour Name field
Learn about Tours
How to set the first page that displays when a tour is run
- Choose Tour > Tour Manager from the Tour Builder menu
- On the Tour Manager screen:
- Select the new first page from the Show First list
Note that this option only appears for tours that have more than one page.
Learn about Tours
How to set the order of pages in a tour
- Choose Tour > Tour Manager from the Tour Builder menu
- On the Tour Manager screen:
- Use the up/down arrows in the Menu and Directory Order list to reorder the pages
Note that this option only appears for tours that have more than one page.
Learn about Tours
Troubleshooting
How to clear your browser cache
Your browser cache stores files used by MapsAlive, but problems can occur if those files have changed since they were cached. By clearing your cache you'll get all the latest files. Find the steps to clear your browser's cache using the links below:
| Browser | Link |
|---|---|
| Google Chrome | https://support.google.com/accounts/answer/32050 |
| Microsoft Edge | https://support.microsoft.com/en-us/microsoft-edge/view-and-delete-browser-history-in-microsoft-edge-00cf7943-a9e1-975a-a33d-ac10ce454ca4 |
| Firefox on a PC or Mac | https://support.mozilla.org/en-US/kb/how-clear-firefox-cache#w_clear-the-cache |
| Firefox on iOS | https://support.mozilla.org/en-US/kb/clear-browsing-history-firefox-ios |
| Firefox on Android | https://support.mozilla.org/en-US/kb/clear-your-browsing-history-and-other-personal-data |
| Safari on Mac | https://support.apple.com/guide/safari/clear-your-browsing-history-sfri47acf5d6/mac |
| Safari on iOS | https://support.apple.com/en-us/HT201265 |
| Learn about Troubleshooting |
How to get support for MapsAlive
If you don't find the information you are looking for in this user guide, or on the MapsAlive website, let us know so that we can help you. Please email questions to support@mapsalive.com.
Learn about Troubleshooting
How to open a private or incognito browser window
When browsing in a private or incognito window, your browser will get all the latest files and data from the server instead of from the cache. Find the steps for your browser using the links below:
Learn about Troubleshooting
Why are are the page names in my menu incorrect after converting from V3 to V4?
In V3, the value of the Map Name field on the Map > Map Setup screen was used as the menu name. In V4, if there is a value in the Map Title field on the Map > Advanced Map Options screen it will be used as the menu name. If the value is blank, the Map Name field is used. If your menu names are not correct, check the Map Title field and either modify the value or remove it.
Learn about Troubleshooting
Why are shape markers covering up symbol markers even though the symbols are higher in the stacking order?
This can be caused by an optimization in MapsAlive called marker caching. To disable marker caching, set the disable-caching tour setting to false. The example below shows how to do this using JavaScript coded on the Custom HTML screen.
function onEventTourLoaded(event) {
    event.api.setTourSetting("disable-caching", true);
}
If this solved the problem, but now the tour is performing slowly, please contact support@mapsalive.com.
Learn about Troubleshooting
Why are some previews on the Font Style Library or Tooltip Style Library screens too small?
This is a remnant of MapsAlive V3 which did not show actual-size previews. You can correct the preview by changing the style and then setting it back to what it was before. For example, set the font size larger, save the style, and then set the font size back to what it was before. This will cause MapsAlive to create a new preview image. Note that you must change something that affects the appearance of the style. Just changing the name of the style won't affect the preview.
Learn about Troubleshooting
Why can't I see the Publish button on the Tour Preview screen?
The Publish button displays in the upper right of the Tour Preview screen. If you have used custom CSS to position your directory or other HTML content above your map on the right hand side, it may be obscuring the Publish button. To make the button visible:
Learn about Troubleshooting
Why do <br> tags disappear from my Custom HTML?
This is a side affect of how the text editor handles HTML. To work around the problem, code <BR> instead of <br>.
Learn about Troubleshooting
Why do my map colors look different from the map image I uploaded?
This can happen when you upload a jpeg image that has its color profile set to something other the sRGB. When you upload the image, MapsAlive stores a copy of the original image at full size (unless it's larger than 4096x4096px, in which case MapsAlive will downsize the image), and also creates smaller versions to use when the map is displayed zoomed out and does not require so much resolution.
MapsAlive creates the smaller versions using the sRGB color profile. As such, the colors may look correct when the map is zoomed out, but not when zoomed in. To fix the problem, set the color profile to sRGB before uploading the image to MapsAlive.
To change the profile using PhotoShop:
- Open the image in PhotoShop
- Choose Edit > Assign Profile from the menu
- On the Assign Profile dialog:
- Choose the Profile option
- Select sRGB IEC6196602.1 (or something close to that)
Learn about Troubleshooting
Why do some markers that are on the map not show in the Map Editor?
This can happen when a very large map is zoomed out and some of the markers are both very small and the markers zoom. When the map is zoomed out, these markers can become so small that they become invisible. The solution is to either use larger markers or change the markers to not zoom.
Learn about Troubleshooting
Why don't I see my changes after publishing my tour?
This is most likely a browser cache problem. When you run your tour in a browser, the browser saves tour files in its cache. After you clear your browser cache and reload your tour, the browser gets the latest files.
See "How to clear your browser cache" above.
Learn about Troubleshooting
Why don't I see some of my marker in the Markers dropdown on the Edit Hotspot Content screen
Markers that are not in use by the current tour won't appear in the dropdown if you had checked the Filter Markers option. To see the markers, choose Library > Filter Markers and uncheck the option.
Learn about Troubleshooting
URLs
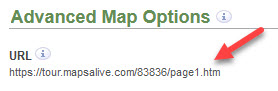
How to find the URL for a specific page in your tour
Once you have published a tour, you can find the URL for a specific page in one of the following locations:
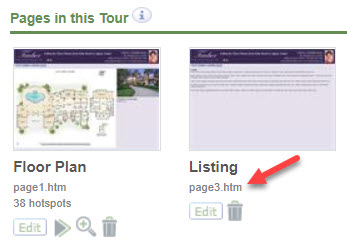
Learn about URLs
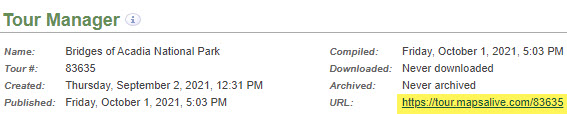
How to find the URL for a tour
Once you have published a tour, its URL will be displayed in these locations:
Learn about URLs
How to show a specific hotspot when a map displays
- Choose Hotspot > Advanced Hotspot Options in the Tour Builder menu
- On the Advanced Hotspot Options screen:
- The URL field at the top of the screen shows the URL to use to display that hotspot when the map first displays
The URL will be similar to tour.mapsalive.com/12345?hotspot=h1 where 12345 is the tour number and h1 is the Hotspot Id found on the Edit Hotspot Content screen.
Learn about URLs
How to use your domain name in a tour URL
To have the tour URL use your domain name, learn about hosting tours on your server.
Learn about URLs
Using Interactive Maps
Code Snippets
How to see a tour's code snippets
- View the tour on the Tour Preview screen
- Click Show Code Snippets at the top of the screen.
Learn about Code Snippets
Embedding Instances of the Same Tour
How to hide the nav button on one instance of a tour, but not the other
To dynamically hide the nav button, use the CSS below, specifying the number of the page to hide.
.maPage-1 .maNavButton {
    display: none;
}
Learn about Embedding Instances of the Same Tour
Embedding Tours in a Web Page
How to embed a tour if my website software won't let me insert embed code
Most website builders will let you add your own HTML and CSS, but some won't let you insert <script> tags. In that case, you can embed with an iframe.
Learn about Embedding Tours in a Web Page
How to get the embed code for a specific tour
- View the tour on the Tour Preview screen
- Click the Show Code Snippets link in the screen header
- Copy the two lines of bolded HTML from section 5 of the snippets
Learn about Embedding Tours in a Web Page
Link to a Tour
How to link to a tour by clicking on a thumbnail image
<a href="https://mapsalive.com/samples/83708" target="_blank">
    <img src='../images/floorplan.jpg' />
</a>
- Copy the code above
- Replace
83751with your tour number - Replace
Floor Planwith your link text - Replace the
<img>tag'ssrcvalue with the URL for your image - Paste the code into a web page
Learn about Link to a Tour
How to link to a tour from a web page so that it opens in a separate browser tab
<a href="https://mapsalive.com/samples/83708" target="_blank">Floor Plan</a>
- Copy the code above
- Replace
83751with your tour number - Replace
Floor Planwith your link text - Paste the code into a web page
Learn about Link to a Tour
How to link to a tour from a web page so that it opens in the current browser window
- Use the code from the answer above, but delete
target="_blank"
Learn about Link to a Tour
Mobile Mode
How to control what MapsAlive considers to be a small mobile device
Use the small-mobile tour setting.
Learn about Mobile Mode
How to manually enable or disable mobile mode
Mobile mode is automatically enabled on small mobile devices, but you can override this behavior. You can make a tour:
- Run in desktop mode on small mobile devices (see an example at the end of this page)
- Run in mobile mode on desktop browsers and large mobile devices.
Mobile mode and desktop mode are mutually exclusive, that is, by disabling mobile mode you enable desktop mode. By enabling mobile mode, you disable desktop mode.
There are two ways to manually enable or disable mobile mode:
- Use the
mobiletour setting or - Choose Tour from the Tour Builder menu
- In the Mobile Mode section of the Tour Manager screen:
- Select True or False for the Mobile Mode option
- In the Mobile Mode section of the Tour Manager screen:
Learn about Mobile Mode
Run a Tour Standalone
How to run a tour standalone from the Tour Builder
You must have first published a tour to run it standalone from the Tour Builder.
-
From the Tour Preview screen:
- Click the tour's URL that appears in the Tour Builder header
-
From the Tour Manager screen:
- Click the tour's URL that appears in the upper right
-
From the Tour Library screen:
- Click the arrow icon that appears below the tour's thumbnail
Learn about Run a Tour Standalone
How to run a tour standalone in a browser
- Open a browser window
- Type or paste the tour's URL into the address bar

Learn about Run a Tour Standalone
Live Data
Requesting Hotspot Content
How to set a hotspot to use Live Data in the Tour Builder
- Choose Hotspot > Advanced Hotspot Options from the Tour Builder menu
- On the Advanced Hotspot Options screen:
- Check the Uses Live Data option as shown below

Learn about Requesting Hotspot Content
How to specify a Live Data hotspot's Live Data request function
- Choose Hotspot > Advanced Hotspot Options from the Tour Builder menu
- On the Advanced Hotspot Options screen:
- Specify a request function call in the Request Function field as shown below. If you leave the field blank, MapsAlive calls
onEventRequestLiveData(event).
- Specify a request function call in the Request Function field as shown below. If you leave the field blank, MapsAlive calls

Learn about Requesting Hotspot Content
API
Event Object
How to get the Event object
The Event object is passed as the only parameter to every callback function.
You can also get the Event object by calling the MapsAlive getEvent method.
Learn about Event Object
Content Management
Archiving Resources
How to export tour or account resources
- Choose Tour > Export from the Tour Builder menu
- On the Export screen
- Click Export Tour Resources or Export Account Resources
- Click the OK button on the confirmation dialog
Learn about Archiving Resources
How to import tour or account resources
- Choose Account > Import > Tour from Archive from the Tour Builder menu
- On the Import Tour From Archive File screen
- Select In a file on my computer
- Browse for the resource archive file you want to import
- Click the Import button.
Learn about Archiving Resources
Archiving Tours
How to archive a tour
- Choose Tour > Export from the Tour Builder menu
- On the Export screen:
- Select Archive Tour
- Click OK
- Save the file in a folder on your computer
Learn about Archiving Tours
How to restore an archived tour
- Choose Tour > Import > Tour From Archive from the Tour Builder menu
- On the Import Tour From Archive File screen:
- Select In a file on my computer or At a URL on the web
- If restoring from a file, browse for the archive file you want to import
- If restoring from a URL, type the URL for the file on the remote server
- Click the Import button
Learn about Archiving Tours
Exporting Content
How to export content to a CSV file
- Choose Tour > Export from the Tour Builder menu
- On the Export screen:
- Click Export Tour Content to CSV
- Click the OK button on the confirmation dialog
Learn about Exporting Content
How to export content to an XML file
- Choose Tour > Export from the Tour Builder menu
- On the Export screen:
- Click Export Tour Content to XML
- Click the OK button on the confirmation dialog
Learn about Exporting Content
Hosting Tours on Your Server
How to download a tour
- Go to the Tour Builder
- Choose Tour > Export from the menu
- Click the Download Published Tour link on the Export screen.
- When prompted, save the tour's zip file to a location on your computer.
The file will have a name like
mapsalivetour12345.zip.
Be sure to read the ReadMe.pdf file in the zip file. It contains important instructions on how to use your downloaded tour.
Learn about Hosting Tours on Your Server
How to make a tour private
- Choose Tour > Tour Manager from the Tour Builder menu
- Check the Private box in the Advanced Options section
- If the tour has already been published, choose Save. This will delete the published tour so that it is no longer accessible on the internet.
The Private feature is available with the Pro Plan.
Learn about Hosting Tours on Your Server
How to upload tour
- Unzip the downloaded zip file into a folder on your computer.
- Rename the folder as you like. For example, if the tour is for a museum, you could rename
mapsalivetour12345tomuseum. - Upload the folder to your web server using an FTP program or other upload mechanism.
- Test that you can run the tour from a browser using the URL on your server, for example:
https://www.somedomain.com/maps/museum
Learn about Hosting Tours on Your Server
Importing Content
How to import hotspot content from a file
- Choose Tour > Import > Content from CSV/Excel/XML from the Tour Builder menu
- On the Import Content screen:
- Select In a file on my computer
- Choose a marker for new hotspots from the Marker dropdown
- Browse for the file you want to import
- Click the Import button
Learn about Importing Content
How to import remote data
- Choose Tour > Import > Content from CSV/Excel/XML from the Tour Builder menu
- On the Import Content screen:
- Select At a URL on the web
- Type the URL for a file or script on your server
- Click the Import button.
Learn about Importing Content
Importing Photos
How to import photos from a zip file
- Choose Tour > Import > Photos from Zip from the Tour Builder menu
- On the Import Photos screen
- Choose a marker from the Marker dropdown
- Browse for the file you want to import
- Click the Import button
Learn about Importing Photos
All Topics A - Z
Data Sheet menu
The Data Sheet menu item is only available when you have selected a data sheet in the Tour Navigator.
Learn about Data Sheets
Gallery menu
The Gallery menu is only enabled when a gallery page is selected in the Tour Navigator.
Learn about Galleries
Popup menu
The Popup menu item is only available when you have selected a page in the Tour Navigator that uses popups.
Learn about Popup Behavior
What is the maximum allowed size for a map image
The maximum size is 4096 x 4096. If you upload a larger image, MapsAlive will scale it to this maximum size.
Learn about Maps
What map image file formats are supported
MapsAlive supports these file formats for a map image: jpeg, png, gif
Learn about Maps
How show the help panel when the tour loads
You can display the help panel using JavaScript by calling the showHelpPanel API method. Use the code below to show the panel when the page loads.
function onEventPageLoaded(event) {
   event.api.showHelpPanel(event.page.id);
}
If you only want to open the panel on desktop browsers but not on mobile browsers, use the code below.
function onEventPageLoaded(event) {
   if (!event.api.isSmallMobileDevice)
      event.api.showHelpPanel(event.page.id);
}
Learn about Help
How to add a banner to a tour
- Choose Layout > Banner Image from the Tour Builder menu
- On the Banner Image screen:
- Click Choose File and browse for your banner image on your computer
- Click Load
You cannot add a banner to a Flex map tour.
Learn about Banners
How to add a data sheet to a tour
- Choose New > Data Sheet from the Tour Builder menu
- On the Edit Data Sheet screen:
- Give the data sheet a name
- Upload a photo and/or add text
Learn about Data Sheets
How to add a gallery to a tour
- Choose New > Gallery from the Tour Builder menu
- On the New Gallery Setup screen:
- Give the gallery a name or accept the default
- Choose a Popup or Tiled layout
- Click the Add Gallery button
Learn about Galleries
How to add a map page to a tour
- Choose New > Map from the Tour Builder menu
- On the New Flex Map Setup or New Map Setup screen:
- Give the map a name or accept the default
- Choose a Popup or Tiled layout for this map's hotspot content
- Click Add Map
TIP: If your new map is similar to another map in your tour, choose the Copy settings from another map in this tour option. You can choose which map to copy, and everything but the map image will be copied to your new map.
Learn about Maps
How to add a new category
- Choose New > Resource > Category from the Tour Builder menu
- On the Edit Cateory screen:
- Choose a category name and code
- Choose Directory Group from the Type dropdown
Learn about Categories
How to add a new hotspot
![]()
- Click the add hotspot icon (see red arrow above) or choose New > Hotspot from the Tour Builder menu
- The Edit Hotspot Content screen displays for the new hotspot
Tip: You can click the add hotspot icon multiple times to quickly create several hotspots.
Learn about Hotspots
How to add a title bar to a tour
- Choose Layout > Advanced Tour Layout from the Tour Builder menu
- On the Advanced Tour Layout screen
- Check Title Bar in the Layout Options section
Learn about Title Bars and Footers
How to add a tour footer
- Choose Layout > Advanced Tour Layout from the Tour Builder menu
- On the Advanced Tour Layout screen
- Type text in the Footer Text box and optionally add a link to your web site or an email address
Instructions for how to format the footer can be found by mousing over the Quick Help icon next to the Footer Text field on the Advanced Tour Layout screen.
Learn about Title Bars and Footers
How to add an effect to a marker style
Learn about Marker Effects
How to add an image to a gallery
- Choose New > Hotspot from the Tour Builder Menu
- On the Edit Hotspot Content screen:
- Choose a Photo Marker from the Marker dropdown
- Choose and load an image
Learn about Galleries
How to add tooltip text to a hotspot
- Choose Hotspot > Edit Hotspot Content from the Tour Builder menu
- On the Edit Hotspot Content screen:
- Type the tooltip text in the Tooltip field
By default tooltips only display when you are using a tiled layout in a Classic tour, and do not display when you are using popups. Normally tooltips display for hotspots only when you are using a tiled layout and not for hotspots that display popups. If you want to display a tooltip for a hotspot that uses popups check the Show Tooltip When No Hotspot Content box on the Popup Behavior screen.
Learn about Tooltips
How to adjust data sheet splitters
- Choose Layout > Splitters from the Tour Builder menu
- On the Splitters screen:
- Drag the horizontal and vertical sliders
Learn about Layouts
How to adjust the offset from the popup to its marker
- Choose Popup > Popup Behavior from the Tour Builder menu
- On the Popup Behavior screen:
- Increase or decrease the pixel value in the Popup Offset field
Learn about Popup Behavior
How to adjust the popup splitters
- Choose Popup Splitter from the Tour Builder menu
- On the Popup Splitter screen:
- Drag the horizontal or vertical slider
Learn about Layouts
How to adjust the tiled page layout splitters
- Choose Layout > Splitters from the Tour Builder menu
- On the Splitters screen:
- Drag the horizontal and vertical sliders
Learn about Layouts
How to apply a marker style to a marker
- Choose Library > Markers from the Tour Builder menu
- On the Marker Library screen:
- Select the marker name to which you want to apply the style
- On the Edit Marker screen:
- Select the marker style from the Marker Style dropdown
You can only assign a marker style to a shape, text, or photo marker. Symbol markers do not have marker styles.
Learn about Marker Styles
How to archive a tour
- Choose Tour > Export from the Tour Builder menu
- On the Export screen:
- Select Archive Tour
- Click OK
- Save the file in a folder on your computer
Learn about Archiving Tours
How to assign a category to a hotspot
- Choose Hotspot > Advanced Hotspot Options from the Tour Builder menu
- On the Advanced Hotspot Options screen:
- Check the categories in the Categories List. You can choose more than one category for a hotspot.
Learn about Categories
How to choose a data sheet template
- Choose Layout > Template Choices from the Tour Builder menu
- On the Template Choices screen:
- Click a template thumbnail
Learn about Data Sheets
How to choose a data sheet template
- Choose Layout > Template Choices from the Tour Builder menu
- On the Template Choices screen:
- Click a template thumbnail
Learn about Layouts
How to choose a popup template
- Choose Popup > Template Choices from the Tour Builder menu
- On the Popup Template Choices screen:
- Click a template thumbnail
Learn about Layouts
How to choose a tiled page template
- Choose Layout > Template Choices from the Tour Builder menu
- On the Template Choices screen:
- Click a template thumbnail
Learn about Layouts
How to choose a tooltip style for a map
- Choose Map > Map Setup from the Tour Builder menu
- On the Map Setup screen:
- Choose a new style from the Tooltip Style dropdown
The tooltip style applies to all hotspots on the same map.
Learn about Tooltips
How to choose the color scheme for a tour
- Choose Layout > Advanced Tour Layout from the Tour Builder menu
- On the Advanced Tour Layout screen:
- Select a color scheme name from the Color Scheme dropdown
Learn about Color Schemes
How to clear your browser cache
Your browser cache stores files used by MapsAlive, but problems can occur if those files have changed since they were cached. By clearing your cache you'll get all the latest files. Find the steps to clear your browser's cache using the links below:
| Browser | Link |
|---|---|
| Google Chrome | https://support.google.com/accounts/answer/32050 |
| Microsoft Edge | https://support.microsoft.com/en-us/microsoft-edge/view-and-delete-browser-history-in-microsoft-edge-00cf7943-a9e1-975a-a33d-ac10ce454ca4 |
| Firefox on a PC or Mac | https://support.mozilla.org/en-US/kb/how-clear-firefox-cache#w_clear-the-cache |
| Firefox on iOS | https://support.mozilla.org/en-US/kb/clear-browsing-history-firefox-ios |
| Firefox on Android | https://support.mozilla.org/en-US/kb/clear-your-browsing-history-and-other-personal-data |
| Safari on Mac | https://support.apple.com/guide/safari/clear-your-browsing-history-sfri47acf5d6/mac |
| Safari on iOS | https://support.apple.com/en-us/HT201265 |
| Learn about Troubleshooting |
How to control if hotspot content is shown on mouseover, on click, or never
- Choose Hotspot > Marker Actions from the Tour Builder menu
- On the Marker Actions screen:
- To show content on mouseover, select Mouse moves over marker
- To show content on click, select Marker is clicked
- To never show content, select Never
The default is to show content on mouseover.
Learn about Marker Actions
How to control map image sharpening
- Choose Map > Advanced Map Options from the Tour Builder menu
- On the Advanced Map Options screen:
- Select an option form the Map Image Sharpening dropdown
Learn about MapZoom
How to control the popup location
- Choose Popup > Popup Behavior from the Tour Builder menu
- On the Popup Behavior screen:
- Choose an option from the Popup Location section
Learn about Popup Behavior
How to control the text in a text marker
- Choose Libary > Markers from the Tour Builder menu
- On the Marker Library screen:
- Click the name of the marker you want to edit
- On the Edit Markers screen:
- To use the hotspot title as the text, leave the Text field blank.
- To set the text for all hotspots that use this marker, type the text in the Text field.
- Set additional Text Options
Learn about Text Markers
How to control what MapsAlive considers to be a small mobile device
Use the small-mobile tour setting.
Learn about Mobile Mode
How to control when a tour switches to stacked layout
See the documentation for the stacked-layout tour setting.
Learn about Responsive Tours
How to control whether popups are pinned when their markers are clicked
- Choose Popup > Popup Behavior from the Tour Builder menu
- On the Popup Behavior screen:
- Check or uncheck the Pin Popup When Marker Clicked box
Learn about Popup Behavior
How to convert a Classic Tour to a Flex Map tour
- Choose Tour > Tour Setup from the Tour Builder menu
- On the Tour Setup screen:
- If the Flex Map option is enabled:
- Choose Flex Map as the Tour Type
- If the Flex Map option is enabled:
If the Flex Map option is disabled, you'll see a list of Classic tour features the tour is using which are not supported by Flex Map tours. To convert the tour to a Flex Map, you would need to change the tour to not use any of those features.
Learn about Flex Map & Classic Tours
How to convert a Flex Map tour to a Classic tour
- Choose Tour > Tour Setup from the Tour Builder menu
- On the Tour Setup screen:
- Choose Classic tour as the Tour Type
Learn about Flex Map & Classic Tours
How to convert a tour from MapsAlive V3 to MapsAlive V4
You can convert a V3 tour to V4 by following these steps to turn off V3 Compatibility Mode:
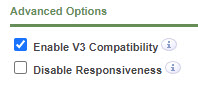
- Choose Tour > Tour Manager from the Tour Builder menu
- In the Advanced Options section of the Tour Manager screen:
- Uncheck the Enable V3 Compatibility option
- The Tour Builder and the tour itself will now use V4 features
Because the V4 menu is on the nav panel, there is no longer a menu bar across the top of the tour as there was in V3. As a result, a V3 tour converted to V4 may have some empty space at the bottom. In that case, you may want to make some minor adjustments to the tour size and/or layout if you want to account for this difference.
Learn about V3 Compatibility
How to convert an existing polygon, line, or hybrid shape marker into a symbol + shape marker
- Choose Library > Markers from the Tour Builder menu
- On the Marker Library screen:
- Click the name of the shape marker you want to convert
- On the Edit Marker screen:
- Choose Symbol + Shape from the Marker Type dropdown
Important: You cannot create a new symbol + shape marker that uses a polygon, line, or hybrid shape in MapsAlive. Currently, to create a polygon, line, or hybrid shape you must edit the coordinates outside of MapsAlive and re-import the shapes. See Importing Marker Shapes for more information.
Learn about Symbol + Shape Markers
How to create a Hotspot Image Size Override category
- Choose New > Resource > Category from the Tour Builder menu
- On the Edit Cateory screen:
- Choose a category name and code
- Choose Hotspot Image Size Override from the Type dropdown
- Specify the width and height
Learn about Categories
How to create a Classic tour
- Choose New > Tour from the Tour Builder menu
- On the Create New Tour screen:
- Choose either help option
- Click the Continue button
- On the New Tour Setup screen:
- Choose Classic tour as the Tour Type
- Click the Continue button
Learn about Flex Map & Classic Tours
How to create a Flex Map tour
- Choose New > Tour from the Tour Builder menu
- On the Create New Tour screen:
- Choose either help option
- Click the Continue button
- On the New Tour Setup screen:
- Choose Flex Map as the Tour Type
- Click the Continue button
Learn about Flex Map & Classic Tours
How to create a circle or rectangle shape marker using the Edit Marker screen
- Choose New > Resource > Marker from the Tour Builder menu
- On the Edit Marker screen:
- Give the marker a name
- Choose Shape from the Marker Type dropdown
- Choose Circle or Rectangle from the Shape dropdown
- Choose a marker style from the Marker Style dropdown or click the New link to create a new marker style
- Specify the circle radius or the rectangle dimensions
Learn about Shape Markers
How to create a marker style
- Choose New > Resource > Marker Style in the Tour Builder menu
- On the Edit Marker Style screen:
- Give the marker style a name
- Set the Line Thickness to define a border for the marker's style or choose '0' for no border
- Set the style attributes for the normal appearance
- Set the style attributes for the selected appearance
Learn about Marker Styles
How to create a new color scheme
- Choose New > Resource > Color Scheme from the Tour Builder menu
- On the Edit Color Scheme screen:
- Choose colors for the tour elements
Learn about Color Schemes
How to create a new font style
- Choose New > Resource > Font Style from the Tour Builder menu
- On the Edit Font Style screen:
- Choose the font family, size, and weight
Learn about Font Styles
How to create a new marker
- Choose New > Resource > Marker from the Tour Builder menu
For more information about creating specific kinds of markers, see the individual marker pages.
Learn about Markers
How to create a new tooltip style
- Choose New > Resource > Tooltip Style from the Tour Builder menu
Learn about Tooltips
How to create a new tour
- Choose New > Tour from the Tour Builder menu
- On the Create New Tour screen:
- Select the Show step-by-step instructions option
- Follow the instructions
- To save time, use the sample map and hotspot images that are provided
Learn about Creating Your First Tour
How to create a photo marker
- Choose New > Resource > Marker from the Tour Builder menu
- On the Edit Marker screen:
- Give the marker a name
- Choose Photo from the Marker Type dropdown
- Choose a marker style from the Marker Style dropdown
- Set additional options
Learn about Photo Markers
How to create a route hotspot
- Select the hotspot to be used for the route from the Tour Navigator
- Choose Hotspot > Advanced Hotspot Options from the Tour Builder menu
- On the Advanced Hotspot Options screen:
- Check the Is Route option
To draw a route, at least one hotspot on your map must have its Is Route attribute set.
Learn about Routes
How to create a symbol + shape marker
- Choose New > Resource > Marker from the Tour Builder menu
- On the Edit Marker screen:
- Give the marker a name
- Choose Symbol + Shape from the Marker Type dropdown
- Choose Circle or Rectangle from the Shape dropdown
- Choose a marker style from the Marker Style dropdown or click the New link to create a new marker style
- Select a symbol from the Normal Symbol dropdown
- Select a symbol from the Selected Symbol dropdown
- Specify the circle radius or the rectangle dimensions
- Set the symbol location within the shape
Learn about Symbol + Shape Markers
How to create a symbol marker that does not change appearance
Choose the same symbol from the Normal Symbol and Selected Symbol dropdowns, or choose No Symbol from the Selected Symbol dropdown on the Edit Marker screen.
Learn about Symbol Markers
How to create a symbol marker that only appears when the hotspot is selected
If you don’t want to clutter your map with symbols, but you want a symbol to appear when the mouse moves over a hotspot, choose No Symbol from the Normal Symbol dropdown on the Edit Marker screen.
Learn about Symbol Markers
How to create a symbol marker
- Choose New > Resource > Marker from the Tour Builder menu
- On the Edit Marker screen:
- Choose a marker name
- Choose Symbol from the Marker Type dropdown
- Choose a normal symbol from the Normal Symbol dropdown
- Choose a selected symbol from the Selected Symbol dropdown
Your new marker is now ready to use for a hotspot. It will appear in the Marker dropdown the next time you go to the Edit Hotspot Content screen.
Learn about Symbol Markers
How to create a text marker
- Choose New > Resource > Marker from the Tour Builder menu
- On the Edit Marker screen:
- Give the marker a name
- Choose Text from the Marker Type dropdown
- Choose Circle or Rectangle from the Shape dropdown
- Choose a marker style from the Marker Style dropdown
- Set Text Colors, Text Options, and Shape Options
Learn about Text Markers
How to create an unbranded tour
To create a tour that can be used both branded and unbranded:
- Choose Tour > Tour Manager from the menu
- On the Tour Manager screen:
- Check Allow Banner Hiding in the Advanced Options section
When you publish your tour, you can run your tour as follows:
Branded:
tour.mapsalive.com/12345
tour.mapsalive.com/12345/page1.htm
Unbranded:
tour.mapsalive.com/12345/?nobanner
tour.mapsalive.com/12345/page1.htm?nobanner
tour.mapsalive.com/12345/index.htm?page=1&nobanner
Learn about Banners
How to create and edit shape and hybrid markers
You can create and edit both shape and hybrid markers using the Map Editor (requires a Plus or Pro Plan). To learn how, see the sections on Creating Shape Markers and Creating Hybrid Markers.
Learn about Shape Markers
How to customize the directory text labels
- Choose Tour > Directory Options from the Tour Builder menu
- On the Directory Options screen:
- Use the Text Options to change the labels for the sort button and search box
Learn about Directories
How to customize the location of the Nav button
- Choose Layout > Advanced Tour Layout from the Tour Builder menu
- On the Advanced Tour Layout screen:
- Set the X and Y values for the Button Offsets option
The button offsets have no effect when the nav button is located in the title bar.
Learn about Navigation
How to delay when popups close on mouseout
- Choose Popup > Popup Behavior from the Tour Builder menu
- On the Popup Behavior screen:
- Choose Close popup after delay from the Delay dropdown
- Type a delay value in milliseconds
A delay value of 500 ms to 1000 ms is a good starting point, but you can experiment to see what works best for your map.
Learn about Popup Behavior
How to delay when popups display on mouseover
- Choose Popup > Popup Behavior from the Tour Builder menu
- On the Popup Behavior screen:
- Choose Delay before showing popup from the Delay dropdown
- Type a delay value in milliseconds
A delay value of 100 ms to 200 ms is a good starting point, but you can experiment to see what works best for your map.
Learn about Popup Behavior
How to delete a category
- Choose Library > Categories from the Tour Builder menu
- On the Categories Library screen:
- Click the name of the category you want to delete
- Choose Library > Delete from the menu
You cannot delete a category that is used by a hotspot. You can see how many hotspots are using a category on the Category Library screen. Click the Usage Count number to see which hotspots maps are using the category.
Learn about Categories
How to delete a color scheme
- Choose Library > Color Schemes from the Tour Builder menu
- On the Color Scheme Library screen:
- Click the name or image of the color scheme you want to delete
- Choose Library > Delete from the menu
You cannot delete a color scheme that is used by a tour.
Learn about Color Schemes
How to delete a data sheet
Do one of the following:
- Choose Tour > Tour Manager from the Tour Builder menu, and then click the trash can icon under the data sheet's thumbnail image.
-
Choose Data Sheet > Delete from the menu to delete the currently selected Data Sheet.
- Click OK on the confirmation dialog. This step displays a second confirmation dialog asking if you are sure you want to delete the data sheet.
- Click OK on the second confirmation dialog. The data sheet is deleted from the tour.
Caution
A deleted map, gallery, or data sheet, along with its hotspots, cannot be recovered. It is permanently removed from our database and cannot be restored.
Learn about Data Sheets
How to delete a font style
- Choose Library > Font Styles from the Tour Builder menu
- On the Font Style Library screen:
- Click the name or image of the font style you want to delete
- Choose Library > Delete Font Style from the meu
You cannot delete a font style that is in use.
Learn about Font Styles
How to delete a gallery
- Choose Gallery > Delete from the Tour Builder menu
- Click OK on the confirmation dialog. This step displays a second confirmation dialog asking if you are sure you want to delete the gallery.
- Click OK on the second confirmation dialog. The gallery is deleted from your account.
Caution
A deleted map, gallery, or data sheet, along with its hotspots, cannot be recovered. It is permanently removed from our database and cannot be restored.
Learn about Galleries
How to delete a hotspot
- Select the hotspot from the Tour Navigator on the left
- Choose Hotspot > Delete from the Tour Builder menu
- Click the DELETE button on the confirmation dialog
Caution
A deleted hotspot cannot be recovered. It is permanently removed from our database and cannot be restored.
Learn about Hotspots
How to delete a map page from a tour
Do one of the following:
- Choose Tour > Tour Manager from the Tour Builder menu, and then click the trash can icon under the map’s thumbnail image.
-
Choose Map > Delete from the menu to delete the currently selected Map.
- Click OK on the confirmation dialog. This step displays a second confirmation dialog asking if you really want to delete the map.
- Click OK on the second confirmation dialog. The map and all of its hotspots is deleted from the tour.
Caution
A deleted map, gallery, or data sheet, along with its hotspots, cannot be recovered. It is permanently removed from our database and cannot be restored.
Learn about Maps
How to delete a marker style
- Choose Library > Marker Styles in the Tour Builder menu
- On the Marker Style Library screen:
- Click the name or image of the marker style you want to delete
- Choose Library > Delete from the menu
You cannot delete a marker style that is used by a marker.
Learn about Marker Styles
How to delete a marker
- Choose Library > Markers from the Tour Builder menu
- On the Marker Library screen:
- Click the name or image of the marker you want to delete
- Choose Library > Delete from the menu
You cannot delete a marker that is used by any hotspots in your account.
Learn about Markers
How to delete a tooltip style
- Choose Library > Tooltip Styles from the Tour Builder menu
- On the Tooltip Style Library screen:
- Click the name or image of the tooltip style you want to delete
- Choose Library > Delete from the menu
You cannot delete a tooltip style that is used by a map.
Learn about Tooltips
How to delete a tour
- Choose Tour > Delete Tour from the Tour Builder menu
- Click OK on the confirmation dialog. This step displays a second confirmation dialog asking if you are sure you want to delete the tour.
- Click OK on the second confirmation dialog. The tour is deleted from your account.
You can also choose Library > Tours from the menu to see a thumbnail view of all your tours and then click the trash can icon below a tour thumbnail to delete a specific tour.
Caution
A deleted tour, along with all of its maps and hotspots, cannot be recovered. It is permanently removed from our database and cannot be restored.
Learn about Tours
How to delete all unused color schemes from your account
- Choose Library > Color Schemes from the Tour Builder menu
- On the Color Scheme Library screen:
- Choose Library > Delete Unused Color Schemes
This will delete all color schemes that are not used by any tours.
Learn about Color Schemes
How to delete all unused font styles from your account
- Choose Library > Font Styles from the Tour Builder menu
- On the Font Style Library screen:
- Choose Library > Delete Unused Font Styles
This will delete all font styles that are not used by markers or tooltips.
Learn about Font Styles
How to delete all unused marker styles from your account
- Choose Library > Marker Styles from the Tour Builder menu
- On the Marker Style Library screen:
- Choose Library > Delete Unused Marker Styles
This will delete all marker styles that are not used by markers.
Learn about Marker Styles
How to delete all unused markers from your account
- Choose Library > Markers from the Tour Builder menu
- On the Marker Library screen:
- Choose Library > Delete Unused Markers
This will delete all markers that are not used by any hotspots.
Learn about Markers
How to delete all unused tooltip styles from your account
- Choose Library > Tooltip Styles from the Tour Builder menu
- On the Tooltip Style Library screen:
- Choose Library > Delete Unused Tooltip Styles
This will delete all tooltip styles that are not used by any maps in your account.
Learn about Tooltips
How to delete multiple hotspots at the same time
To delete hotspots from a map:
- Choose Map > Delete Hotspots from the Tour Builder menu
To delete hotspots from a gallery:
- Choose Gallery > Delete Hotspots from the Tour Builder menu
Then, on the Delete Hotspots screen:
- Check the hotspots you want to delete
- Click the Delete button
- Click the DELETE button on the confirmation dialog
Caution
Deleted hotspots cannot be recovered. They are permanently removed from our database and cannot be restored.
Learn about Hotspots
How to delete multiple images from a gallery
- Choose Gallery > Delete Hotspots from the Tour Builder Menu
- On the Delete Hotspots screen:
- Check the images you want to delete
- Click the Delete button
- On the confirmation dialog, click the DELETE button
Learn about Galleries
How to disable a marker so that it does not respond to mouseover, mouseout, and click events
- Choose Hotspot > Advanced Hotspot Options from the Tour Builder menu
- On the Advanced Hotspot Options screen:
- Check the Is Static marker attribute
You can dynamically disable or enable a marker by using the API to call the setMarkerDisabled method.
Learn about Marker Attributes
How to disable map zooming
You disable zooming by not enabling it.
- Choose Map > Advanced Map Options from the Tour Builder menu
- On the Advanced Map Options screen:
- Uncheck the Enable MapZoom option
When you disable MapZoom, the zoom controls and map inset will not appear and you will not be able to zoom the map using the mouse wheel or pinch gesture. The map will be displayed zoomed all the way out.
Learn about MapZoom
How to display a video, web page, or Google map in a hotspot's content
You can embed a video, HTML document or web page, or Google map in your hotspot content by pasting the HTML embed code directly into your hotspot’s content.
- Choose Hotspot > Edit Hotspot Content from the Tour Builder menu
- On the Edit Hotspot Content screen:
- Choose Multimedia from the Media dropdown. This step changes the hotspot content type from Photo to Multimedia and displays the Multimedia field. Note that changing the hotspot type to Multimedia removes the hotspot's photo if any.
- Paste the HTML embed code for your video or other multimedia into the Multimedia field and choose Save
Videos must already be hosted on a server somewhere such as YouTube or your own server. You cannot upload a video directly to MapsAlive. You can paste HTML for one
<iframe>or one<video>tag. You cannot use any other HTML tags in the Multimedia field and you can only include one complete tag per hotspot. Any HTML that appears after the closing tag for one of the supported tags is automatically truncated.
Learn about Hotspots
How to display hotspot content as a slideshow
- Click Map > Advanced Map Options in the menu
- On the Advanced Map Options screen:
- Check the Run Slide Show When Map Loads checkbox
When the box is checked, the content for each hotspot on the map displays for the number of seconds you choose from the dropdown. The slide show stops automatically when you mouse over a marker.
Learn about Slideshow
How to download a tour
- Go to the Tour Builder
- Choose Tour > Export from the menu
- Click the Download Published Tour link on the Export screen.
- When prompted, save the tour's zip file to a location on your computer.
The file will have a name like
mapsalivetour12345.zip.
Be sure to read the ReadMe.pdf file in the zip file. It contains important instructions on how to use your downloaded tour.
Learn about Hosting Tours on Your Server
How to duplicate a color scheme
Making a copy is a good way to customize a color scheme without modifying the original.
- Choose Library > Color Schemes from the Tour Builder menu
- On the Color Scheme Library screen:
- Click the name or image of the color scheme you want to duplicate
- Choose Library > Duplicate from the menu
Learn about Color Schemes
How to duplicate a font style
Making a copy is a good way to customize a font style without modifying the original.
- Choose Library > Font Styles from the Tour Builder menu
- On the Font Style Library screen:
- Click the name or image of the font style you want to duplicate
- Choose Library > Duplicate from the menu
Learn about Font Styles
How to duplicate a marker style
Making a copy is a good way to customize a marker style without modifying the original.
- Choose Library > Marker Styles from the Tour Builder menu
- On the Marker Style Library screen:
- Select the name of the marker style you want to duplicate
- Choose Library > Duplicate from the menu
Learn about Marker Styles
How to duplicate a marker
Making a copy is a good way to customize a marker without modifying the original.
- Choose Library > Markers from the Tour Builder menu
- On the Marker Library screen:
- Click the name or image of the marker you want to duplicate
- Choose Library > Duplicate from the menu
Learn about Markers
How to duplicate a tooltip style
- Choose Library > Tooltip Styles from the Tour Builder menu
- On the Tooltip Style Library screen:
- Click the name or image of the tooltip style you want to duplicate
- Choose Library > Duplicate from the menu
Learn about Tooltips
How to duplicate a tour
- Choose Tour > Duplicate from the Tour Builder menu
The Duplicate Tour feature is a Pro Plan feature
Learn about Tours
How to edit a color scheme
- Choose Library > Color Scheme from the Tour Builder menu
- On the Color Scheme Library screen:
- Click the name or image of the color scheme you want to edit
When you edit a color scheme, all tours that use that scheme are affected. To have the changes apply to only one tour, duplicate an existing color scheme, make the changes to the copy, and use the copy for the tour that needs the changes. This way the original color scheme does not change and other tours won't be affected.
Learn about Color Schemes
How to edit a font style
- Choose Library > Font Styles from the Tour Builder menu
- On the Font Style Library screen:
- Click the name or image of the font style you want to edit
You can also edit a font style directly by clicking the Edit link next to the Font dropdown on the Edit Tooltip Style or Edit Marker screen.
Learn about Font Styles
How to edit a hotspot
- Choose Hotspot > Edit Hotspot Content from the Tour Builder menu
Learn about Hotspots
How to edit a marker style
- Choose Library > Marker Styles in the Tour Builder menu
- On the Marker Style Library screen:
- Click the name or image of the marker style you want to edit
Learn about Marker Styles
How to edit a marker
- Choose Library > Markers from the Tour Builder menu
- On the Marker Library screen:
- Click the name or image of the marker you want to edit
You can also edit a hotspot's marker directly by clicking the Edit link next to the Marker dropdown on the Edit Hotspot Content screen.
Learn about Markers
How to edit a new category
- Choose Library > Categories from the Tour Builder menu
- Click the name of the category you want to edit
Learn about Categories
How to edit a photo marker
- Choose Libary > Marker from the Tour Builder menu
- On the Marker Library screen:
- Click the name or image of the marker you want to edit
Learn about Photo Markers
How to edit a shape marker using the Edit Marker screen
- Choose Library > Markers from the Tour Builder menu
- On the Marker Library screen:
- Click the name of the marker you want to edit
You can also edit the shape marker by clicking the Edit link next to the Marker dropdown on the Edit Hotspot Content screen.
Learn about Shape Markers
How to edit a symbol + shape marker
- Choose Library > Markers from the Tour Builder menu
- On the Marker Library screen:
- Click the name of the marker you want to edit
Learn about Symbol + Shape Markers
How to edit a symbol image
- Choose Library > Symbols in the Tour Builder menu
- On the Symbol Library screen:
- Click the name or image of the symbol whose image you want to edit
Learn about Symbol Markers
How to edit a text marker
- Choose Libary > Markers from the Tour Builder menu
- On the Marker Library screen:
- Click the name of the marker you want to edit
Learn about Text Markers
How to edit a tooltip style
- Choose Library > Tooltip Styles from the Tour Builder menu
- On the Tooltip Style Library screen:
- Click the name or image of the tooltip style you want to edit
Learn about Tooltips
How to edit the HTML for a hotspot's text content
- Choose Hotspot > Edit Hotspot Content from the Tour Builder menu
- On the Edit Hotspot Content screen:
- Click the Source code icon
<>on the right of the Text editor menu - Edit your HTML and click Save
- Click the Source code icon
Learn about Hotspots
How to embed a tour if my website software won't let me insert embed code
Most website builders will let you add your own HTML and CSS, but some won't let you insert <script> tags. In that case, you can embed with an iframe.
Learn about Embedding Tours in a Web Page
How to enable or disable the directory feature
- Choose Tour > Directory Options from the Tour Builder menu
- On the Directory Options screen:
- Check or uncheck the Show Directory option
Learn about Directories
How to exclude a hotspot from the directory
- Choose Hotspot > Advanced Hotspot Options from the Tour Builder menu
- On the Advanced Hotspot Options screen:
- Check the Exclude From Directory checkbox
Learn about Directories
How to exclude a page from navigation
To prevent a map from appearing on the nav panel:
- Choose Map > Advanced Map Options from the Tour Builder menu
- On the Advanced Map Options screen:
- Check the Exclude From Navigation option
To prevent a gallery from appearing on the nav panel:
- Choose Gallery > Advanced Gallery Options from the Tour Builder menu
- On the Advanced Gallery Options screen:
- Check the Exclude From Navigation option
To prevent a data sheet from appearing on the nav panel:
- Choose Data Sheet > Advanced Data Sheet Options from the Tour Builder menu
- On the Advanced Data Sheet Options screen:
- Check the Exclude From Navigation option
Learn about Navigation
How to execute JavaScript on click, or mouseover, or mouseout
- Choose Hotspot > Hotspot Actions from the Tour Builder menu
- On the Hotspot Actions screen:
- Choose Execute JavaScript from the Click Action, Mouseover Action, or Mouseout Action dropdown
- Type the JavaScript code you want to execute in the text box that opens
Learn about Marker Actions
How to export content to a CSV file
- Choose Tour > Export from the Tour Builder menu
- On the Export screen:
- Click Export Tour Content to CSV
- Click the OK button on the confirmation dialog
Learn about Exporting Content
How to export content to an XML file
- Choose Tour > Export from the Tour Builder menu
- On the Export screen:
- Click Export Tour Content to XML
- Click the OK button on the confirmation dialog
Learn about Exporting Content
How to export tour or account resources
- Choose Tour > Export from the Tour Builder menu
- On the Export screen
- Click Export Tour Resources or Export Account Resources
- Click the OK button on the confirmation dialog
Learn about Archiving Resources
How to filter categories to see only the ones used by the current tour
- Choose Library > Categories from the Tour Builder menu
- Then, choose Library > Filter Categories from the menu
Uncheck Filter Categories to stop filtering.
Learn about Categories
How to filter markers to see only the ones used by the current tour
- Choose Library > Markers from the Tour Builder menu
- Then, choose Library > Filter Markers from the menu
Uncheck Filter Markers to stop filtering. Also, note that bound markers only appear on the Marker Library screen when you choose to filter markers.
Learn about Markers
How to find a hotspot on the map
There are three ways to locate a hotspot on the map:
-
From the Edit Hotspot Content screen:
- Click Locate this hotspot on the map
-
From the Map Editor screen
- Click the hotspot's thumbnail in the Hotspot Thumbnails section that appears below the map
-
From the Map Editor screen
- Choose the hotspot's title from the hotspot dropdown list
Learn about Hotspots
How to find the URL for a specific page in your tour
Once you have published a tour, you can find the URL for a specific page in one of the following locations:
Learn about URLs
How to find the URL for a tour
Once you have published a tour, its URL will be displayed in these locations:
Learn about URLs
How to get support for MapsAlive
If you don't find the information you are looking for in this user guide, or on the MapsAlive website, let us know so that we can help you. Please email questions to support@mapsalive.com.
Learn about Troubleshooting
How to get the Event object
The Event object is passed as the only parameter to every callback function.
You can also get the Event object by calling the MapsAlive getEvent method.
Learn about Event Object
How to get the embed code for a specific tour
- View the tour on the Tour Preview screen
- Click the Show Code Snippets link in the screen header
- Copy the two lines of bolded HTML from section 5 of the snippets
Learn about Embedding Tours in a Web Page
How to get the highest image quality for hotspots
For the highest image quality, upload or import jpg images having the same dimensions as your tour's tiled or popup layout image area. For example, if the image area is 600 x 400, upload images that are 600 x 400. When you do this, the image MapsAlive displays will be identical to what you uploaded and its EXIF data such as a copyright notice will be preserved. If you upload an image having much larger dimensions, MapsAlive may scale the image to fit. Due to the nature of jpg images which degrade a little bit every time they are saved, a scaled image may not look quite as good as the original nor will its EXIF data be preserved.
Learn about Galleries
How to get to the Map Editor
- Click the map icon (red arrow ) or choose Map > Map Editor from the Tour Builder Menu.
Learn about Map Editor
How to group entries in the directory
- Choose Tour > Directory Options from the Tour Builder menu
- On the Directory Options screen:
- Choose a grouping option from the Grouping dropdown
Learn about Directories
How to have a map page with no map image
You can use MapsAlive to create an interactive map with no map, just a background. To do this, simply don't upload a map image, though if you like, you can set a background color using the Map Background Color option on the Advanced Map Options screen. You can add hotspots and place them on the map background using the Map Editor just as you would if there were a map image.
Learn about Maps
How to hide a map's zoom controls, but still allow zooming
You can hide the zoom controls with the CSS shown below:
#maZoomInControl, #maZoomOutControl {
   display: none;
}
When you hide the controls using CSS, you can still zoom the map using the mouse wheel or the pinch gesture.
Learn about MapZoom
How to hide a marker that is on the map
- Choose Hotspot > Advanced Hotspot Options from the Tour Builder menu
- On the Advanced Hotspot Options screen:
- Check the Is Hidden marker attribute
You can dynamically hide or show a marker by using the API to call the setMarkerHidden method.
Learn about Marker Attributes
How to hide the Nav button
You can hide the Nav button if you don't want to provide any navigation.
- Choose Layout > Advanced Tour Layout from the Tour Builder menu
- On the Advanced Tour Layout screen:
- Check the Hide Nav Button box
Learn about Navigation
How to hide the menu
- Choose Tour > Directory Options from the Tour Builder menu
- On the Directory Options screen:
- Uncheck the Show Menu option
Learn about Menus
How to hide the nav button on one instance of a tour, but not the other
To dynamically hide the nav button, use the CSS below, specifying the number of the page to hide.
.maPage-1 .maNavButton {
    display: none;
}
Learn about Embedding Instances of the Same Tour
How to import default MapsAlive resources
- Choose Account > Preferences from the Tour Builder menu
- On the Preferences screen
- Click Import MapsAlive Resources
Learn about V3 Compatibility
How to import hotspot content from a file
- Choose Tour > Import > Content from CSV/Excel/XML from the Tour Builder menu
- On the Import Content screen:
- Select In a file on my computer
- Choose a marker for new hotspots from the Marker dropdown
- Browse for the file you want to import
- Click the Import button
Learn about Importing Content
How to import marker shapes
- In the Tour Navigator choose the map that you want to import shapes
- Choose Tour > Import > Marker Shapes from the Tour Builder menu
- On the Import Marker Shapes screen:
- Select a marker style from the Marker Style dropdown
- Click Choose File and browse for the file on your computer that contains your marker shape definitions
- Click Import Learn about Shape Markers
How to import photos from a zip file
- Choose Tour > Import > Photos from Zip from the Tour Builder menu
- On the Import Photos screen
- Choose a marker from the Marker dropdown
- Browse for the file you want to import
- Click the Import button
Learn about Importing Photos
How to import remote data
- Choose Tour > Import > Content from CSV/Excel/XML from the Tour Builder menu
- On the Import Content screen:
- Select At a URL on the web
- Type the URL for a file or script on your server
- Click the Import button.
Learn about Importing Content
How to import routes from a CSV file or Excel spreadsheet
- Choose Tour > Import Routes from the Tour Builder menu
- On the Import Routes screen:
- Browse for the spreadsheet file containing the routes
- Click the Import button
During the import process, MapsAlive resolves each Id it encounters by comparing it to the Hotspot Ids present in the tour. If a route references a Hotspot Id that does not exist, MapsAlive will report an error and reject any routes that use that Hotspot Id.
Learn about Routes
How to import tour or account resources
- Choose Account > Import > Tour from Archive from the Tour Builder menu
- On the Import Tour From Archive File screen
- Select In a file on my computer
- Browse for the resource archive file you want to import
- Click the Import button.
Learn about Archiving Resources
How to keep the directory panel open
- Choose Tour > Directory Options from the Tour Builder menu
- On the Directory Options screen:
- Check the Stay Open checkbox
Learn about Directories
How to link to a tour by clicking on a thumbnail image
<a href="https://mapsalive.com/samples/83708" target="_blank">
    <img src='../images/floorplan.jpg' />
</a>
- Copy the code above
- Replace
83751with your tour number - Replace
Floor Planwith your link text - Replace the
<img>tag'ssrcvalue with the URL for your image - Paste the code into a web page
Learn about Link to a Tour
How to link to a tour from a web page so that it opens in a separate browser tab
<a href="https://mapsalive.com/samples/83708" target="_blank">Floor Plan</a>
- Copy the code above
- Replace
83751with your tour number - Replace
Floor Planwith your link text - Paste the code into a web page
Learn about Link to a Tour
How to link to a tour from a web page so that it opens in the current browser window
- Use the code from the answer above, but delete
target="_blank"
Learn about Link to a Tour
How to link to a web page from a banner
- Choose Layout > Banner Image from the Tour Builder menu
- On the Banner Image screen:
- Type the URL for the web page
- Check the Open URL in New Window box if you want the web page to open in a separate browser window
- To add a tooltip type the text in the Tooltip Text field
Learn about Banners
How to link to another page in your tour
- Choose Hotspot > Marker Actions from the Tour Builder menu
- On the Marker Actions_ screen:
- Choose Go to Page from the Click Action dropdown
- Select the page name from the dropdown
The Go to Page option is not shown for single page tours.
Learn about Marker Actions
How to link to another web page on click
- Choose Hotspot > Hotspot Actions from the Tour Builder menu
- On the Hotspot Actions screen:
- Choose Link to URL from the Click Action dropdown
- Type the URL in the text box that opens
- Optionally, choose whether to open the web page in a new window
Learn about Marker Actions
How to make a map or gallery use a tiled page layout
To use a tiled page layout for a map:
- Choose Map > Setup from the Tour Builder menu
- On the Map Setup screen:
- Click the Tiled radio button
Note: You cannot choose a tiled page layout for Flex maps.
To use a tiled page layout for a gallery:
- Choose Gallery > Setup from the Tour Builder menu
- On the Gallery Setup screen:
- Click the Tiled radio button
Learn about Layouts
How to make a marker float over the map by not being anchored to the map
- Choose Hotspot > Advanced Hotspot Options from the Tour Builder menu
- On the Advanced Hotspot Options screen:
- Check the Is Not Anchored to Map marker attribute
Learn about Marker Attributes
How to make a repeating gallery background image
- Choose Gallery > Gallery Editor from the Tour Builder Menu
- On the Gallery Editor screen:
- Select Repeat from the Background Image dropdown
Learn about Galleries
How to make a tour private
- Choose Tour > Tour Manager from the Tour Builder menu
- Check the Private box in the Advanced Options section
- If the tour has already been published, choose Save. This will delete the published tour so that it is no longer accessible on the internet.
The Private feature is available with the Pro Plan.
Learn about Hosting Tours on Your Server
How to manually enable or disable mobile mode
Mobile mode is automatically enabled on small mobile devices, but you can override this behavior. You can make a tour:
- Run in desktop mode on small mobile devices (see an example at the end of this page)
- Run in mobile mode on desktop browsers and large mobile devices.
Mobile mode and desktop mode are mutually exclusive, that is, by disabling mobile mode you enable desktop mode. By enabling mobile mode, you disable desktop mode.
There are two ways to manually enable or disable mobile mode:
- Use the
mobiletour setting or - Choose Tour from the Tour Builder menu
- In the Mobile Mode section of the Tour Manager screen:
- Select True or False for the Mobile Mode option
- In the Mobile Mode section of the Tour Manager screen:
Learn about Mobile Mode
How to open a private or incognito browser window
When browsing in a private or incognito window, your browser will get all the latest files and data from the server instead of from the cache. Find the steps for your browser using the links below:
Learn about Troubleshooting
How to override the size of a specific popup
- Click the hotspot name in the Tour Navigator
- Choose Hotspot > Advanced Hotspot Options from the Tour Builder menu
- On the Advanced Hotspot Options screen:
- Set the exact width and/or height for the popup
Learn about Layouts
How to place a hotspot on a map
See How to place a hotspot on the map in the Hotspot Content section
Learn about Markers
How to place a hotspot on the map
There are three ways to place a hotspot on the map:
-
From the Edit Hotspot Content screen:
- Click Place this hotspot on the map
-
From the Map Editor screen:
- Click the hotspot's thumbnail in the Hotspot Thumbnails section that appears below the map
-
From the Map Editor screen:
- Choose the hotspot's title from the hotspot dropdown list
Hotspot Dropdown List
Learn about Hotspots
How to prevent a tour from switching to stacked layout when the browser is narrow
Use the API's setTourSetting function to set the stacked-layout setting as shown below. You can place the code in the JavaScript field of the Custom HTML screen.
function onEventPageLoaded(event) {
   event.api.setTourSetting("stacked-layout",0);
}
Learn about Responsive Tours
How to preview a marker on the Edit Marker screen
- Choose Library > Markers from the Tour Builder menu
- On the Marker Library screen:
- Click the name or image of the marker you want to preview
- On the Edit Marker screen:
- If you have modified the marker, click Save
- Move your mouse over and off the marker in the preview area in the upper right
Learn about Markers
How to preview a tour
To get to the Tour Preview screen:
- Click the Tour Preview button that appears at the upper right on most Tour Builder pages
- A screen similar to the one shown below will appear
- When done, click Return to Tour Builder to make more changes, or click the Publish button to publish the tour.
Learn about Previewing a Tour
How to provide help for a map or gallery page
- Choose Map > Advanced Map Options from the Tour Builder menu
- On the Advanced Map Options screen:
- Check the Show Help for this Map box
- Fill in the fields
- Choose Gallery > Advanced Gallery Options from the Tour Builder menu
- On the Advanced Gallery Options screen:
- Check the Show Help for this Gallery box
- Fill in the fields
Learn about Help
How to publish a tour
- View the tour in Tour Preview
- On the Tour Preview screen:
- Click the orange Publish button
- A confirmation dialog appears as shown below that shows the tour's URL
- Click the blue Publish button on the dialog
After a few seconds:
Learn about Publishing a Tour
How to remove a banner from a tour
- Choose Layout > Banner Image from the Tour Builder menu
- On the Banner Image screen:
- Click the Remove banner link
Learn about Banners
How to remove a tour footer
- Choose Layout > Advanced Tour Layout from the Tour Builder menu
- On the Advanced Tour Layout screen
- Remove all text and links from the Footer Text box
Learn about Title Bars and Footers
How to remove or replace the map image on a map page
- Choose Map > Choose Map Image from the menu
- On the Choose Map Image screen you can either upload a different image or remove the current image
Learn about Maps
How to remove the title bar from a tour
- Choose Layout > Advanced Tour Layout from the Tour Builder menu
- On the Advanced Tour Layout screen
- Uncheck Title Bar in the Layout Options section
If the Nav button location is set to Title Bar and you remove the title bar from your tour, MapsAlive will automatically change the Nav Button Location to Above Right.
Learn about Title Bars and Footers
How to rename a tour
- Choose Tour > Tour Setup from the Tour Builder menu
- On the Tour Setup screen:
- Type the new name in the Tour Name field
Learn about Tours
How to replace a banner in a tour
Follow the same steps as for adding a banner to a tour. You do not need to remove an existing banner first.
Learn about Banners
How to replace a symbol image
- Choose Library > Symbols in the Tour Builder menu
- On the Symbol Library screen:
- Click the name or image of the symbol whose image you want to replace
- Upload a new image
When you replace a symbol image, all markers that use that symbol will be updated automatically.
Learn about Symbol Markers
How to replace multiple marker styles at once
- Choose Map > Replace > Marker Styles from the Tour Builder menu
- On the Replace Marker Styles screen:
- Select a new style from the New Marker Style dropdown
- Check the box next to the hotspots for which you want to replace the marker style
- Click Replace
Only those hotspots that use shape markers, text markers, or photo markers are displayed in the list.
The Replace Marker Styles feature is included in the Plus and Pro Plans.
Learn about Marker Styles
How to replace multiple markers at once
- Choose Map > Replace > Markers or Styles > Markers from the Tour Builder menu
- On the Replace Markers screen:
- Choose a new marker from the New Marker dropdown
- Check the box next to the hotspots for which you want to replace the marker
- Click Replace
The Replace Markers feature is included in the Plus and Pro Plans.
Learn about Markers
How to replace the photo marker for every image in a gallery
- Choose Gallery > Replace > Markers from the Tour Builder Menu
- On the Replace Markers screen:
- Choose a new marker from the list
- Click the Check All link
- Click the Replace button (there is no confirmation dialog)
Learn about Galleries
How to restore an archived tour
- Choose Tour > Import > Tour From Archive from the Tour Builder menu
- On the Import Tour From Archive File screen:
- Select In a file on my computer or At a URL on the web
- If restoring from a file, browse for the archive file you want to import
- If restoring from a URL, type the URL for the file on the remote server
- Click the Import button
Learn about Archiving Tours
How to run a tour standalone from the Tour Builder
You must have first published a tour to run it standalone from the Tour Builder.
-
From the Tour Preview screen:
- Click the tour's URL that appears in the Tour Builder header
-
From the Tour Manager screen:
- Click the tour's URL that appears in the upper right
-
From the Tour Library screen:
- Click the arrow icon that appears below the tour's thumbnail
Learn about Run a Tour Standalone
How to run a tour standalone in a browser
- Open a browser window
- Type or paste the tour's URL into the address bar
Learn about Run a Tour Standalone
How to see a tour's code snippets
- View the tour on the Tour Preview screen
- Click Show Code Snippets at the top of the screen.
Learn about Code Snippets
How to see all the categories in your MapsAlive account
- Choose Library > Categories from the Tour Builder menu
Learn about Categories
How to see all the marker styles in your account
- Choose Library > Marker Styles in the Tour Builder menu
Learn about Marker Styles
How to see all the markers in your MapsAlive account
- Choose Library > Markers from the Tour Builder menu
Learn about Markers
How to see all the symbols in your account
- Choose Library > Symbols in the Tour Builder menu
Learn about Symbol Markers
How to see the dimensions of a map image I already uploaded
- Choose Map > Choose Map Image from the Tour Builder menu
- On the Choose Map Image screen:
- The dimensions of the currently uploaded map appear below the map image
Learn about Maps
How to see which hotspots are using a marker
- Choose Library > Markers from the Tour Builder menu
- On the Marker Library screen:
- Click Show Details View
- The details view displays the number of uses to the left of the marker preview, or "Not used"
- Click the link to see which hotspots are using the marker
Learn about Markers
How to see which maps are using a tooltip style
- Choose Library > Tooltips from the Tour Builder menu
- On the Tooltip Library_ screen:
- Click Show Details View
- The details view displays the number of uses to the left of the tooltip style preview, or "Not used"
- Click the link to see which maps are using the tooltip style
Learn about Tooltips
How to see which markers and tooltips are using a font style
- Choose Library > Font Styles from the Tour Builder menu
- On the Font Style Library screen:
- Click Show Details View
- The details view displays the number of uses to the left of the symbol preview, or "Not used"
- Click the link to see which markers and tooltips are using the font style
Learn about Font Styles
How to see which markers are using a marker style
- Choose Library > Marker Styles from the Tour Builder menu
- On the Marker Style Library screen:
- Click Show Details View
- The details view displays the number of uses to the left of the marker style preview, or "Not used"
- Click the link to see which markers are using the marker style
Learn about Marker Styles
How to see which markers are using a symbol
- Choose Library > Symbols from the Tour Builder menu
- On the Symbol Library screen:
- Click Show Details View
- The details view displays the number of uses to the left of the symbol preview, or "Not used"
- Click the link to see which markers are using the symbol
Learn about Symbol Markers
How to set a hotspot's id
- Choose Hotspot > Edit Hotspot Content in the Tour Builder menu
- On the Edit Hotspot Content screen:
- Type the new id in the Hotspot Id field
Learn about Hotspots
How to set a marker for a hotspot
- Choose Hotspot > Edit Hotspot Content from the Tour Builder menu
- On the Edit Hotspot Content screen
- Choose a marker name from the Marker dropdown
Learn about Markers
How to set a marker's zoom visibility threshold
- Choose Map > Advanced Map Options from the Tour Builder menu
- On the Advanced Map Options screen:
- Enter a percentage value in the Zoom Visibility Threshold field
- Use a positive value to show the marker when the map is zoomed above the threshold
- Use a negative value to show the marker when the map is zoomed at or below the threshold
To help you determine what percentage to use for the threshold, the Map Editor displays the zoom level in its control panel as shown below.
Learn about Marker Zooming
How to set a specific marker to zoom
- Choose Hotspot > Advanced Hotspot Options from the Tour Builder menu
- On the Advanced Hotspot Options screen:
- Choose Yes from the Marker Zooms dropdown
Learn about Marker Zooming
How to set all markers on a map to zoom
- Choose Map > Advanced Map Options from the Tour Builder menu
- On the Advanced Map Options screen:
- Check or uncheck Markers Zoom
Learn about Marker Zooming
How to set data sheet margins and spacing
- Choose Layout > Margins and Spacing from the Tour Builder menu
- On the Margins and Spacing screen:
- Type margin values in pixels in the Margins fields
- Type spacing values in pixels in the Spacing fields
Learn about Layouts
How to set directory colors
- Choose Tour > Directory Options from the Tour Builder menu
- On the Directory Options screen:
- In the Colors section, select colors by clicking on the color swatch
Learn about Directories
How to set map margins for popup layouts
- Choose Layout > Map Margins from the Tour Builder menu
- On the Map Margins screen:
- Type margin values in pixels in the Margins fields
Learn about Layouts
How to set menu colors
You specify menu colors by editing the tour's color scheme fields shown below:
Learn about Menus
How to set popup margins and spacing
- Choose Popup > Popup Size and Appearance from the Tour Builder menu
- On the Popup Size and Appearance screen:
- Type margin values in pixels in the Margins fields
- Type a spacing value in pixels in the Spacing field
Learn about Layouts
How to set prevent a marker from changing its appearance from normal to selected
- Choose Hotspot > Advanced Hotspot Options from the Tour Builder menu
- On the Advanced Hotspot Options screen:
- Check the Is Static marker attribute
Learn about Marker Attributes
How to set the Markers Zoom default
- Choose Account > Preferences from the Tour Builder menu
- On the Preferences screen:
- Check or uncheck Markers Zoom Default
The setting will be used whenever you create a new map.
Learn about Marker Zooming
How to set the anchor location of a symbol marker
The anchor location defines the point around which a marker will rotate. By default, a symbol marker is anchored in the center of the symbol, but you can change the anchor location. For example, if you have a pin marker you might want the anchor location to be the tip of the pin. That way, if you rotate the pin marker on the map, it will rotate around the tip of the pin rather than the center.
- Choose Library > Markers from the Tour Builder menu
- On the Marker Library screen:
- Click the name or image of the marker you want to edit
- On the Edit Marker screen:
- Choose Off Center from the Anchor Location dropdown
- Enter values for X and Y
Learn about Symbol Markers
How to set the background color of a banner
The banner background color is part of your tour's color scheme.
- Choose Layout > Advanced Tour Layout from the Tour Builder menu
- On the Advanced Tour Layout screen:
- Click the Edit link next to the Color Scheme dropdown
- On the Edit Color Scheme screen:
- Set a background color in the Banner Background field
Learn about Banners
How to set the color of the map zoom controls
- Choose Map > Advanced Map Options from the Tour Builder menu
- On the Advanced Map Options screen:
- Choose a color for the Zoom Controls Color option
Learn about MapZoom
How to set the default marker
- Choose Account > Preferences from the Tour Builder menu
- On the Preferences screen:
- Choose a marker from the Default Marker dropdown
Learn about Markers
How to set the first hotspot that displays when a map loads
- Choose Map > Map Setup from the menu
- On the Map Setup screen:
- Choose the hotspot from the First Hotspot dropdown
Learn about Hotspots
How to set the first hotspot that displays when a map page loads
- Choose Map > Map Setup from the menu
- On the Map Setup screen:
- Choose the hotspot from the First Hotspot dropdown
Learn about Maps
How to set the first page that displays when a tour is run
- Choose Tour > Tour Manager from the Tour Builder menu
- On the Tour Manager screen:
- Select the new first page from the Show First list
Note that this option only appears for tours that have more than one page.
Learn about Tours
How to set the font style for a Photo Marker or Text Marker
- Choose Library > Markers from the Tour Builder menu
- On the Marker Library screen:
- Select a photo marker or text marker from the list
- On the Edit Marker screen:
- Select the font style from the Font dropdown
A Photo Marker must have a Photo Caption in order to assign a font style because the font style applies to the caption.
Learn about Font Styles
How to set the font style for a Tooltip style
- Choose Library > Tooltip Styles from the Tour Builder menu
- On the Tooltip Style Library screen:
- Select the tooltip style name from the list
- On the Edit Tooltip Style screen:
- Select the font style from the Font dropdown
Learn about Font Styles
How to set the length of the popup callout
- Choose Popup > Popup Behavior from the Tour Builder menu
- On the Popup Behavior screen:
- Choose a length from the Callout dropdown
Learn about Popup Behavior
How to set the location of the Nav button
- Choose Layout > Advanced Tour Layout from the Tour Builder menu
- On the Advanced Tour Layout screen:
- Choose a location from the Nav Button Location dropdown
Learn about Navigation
How to set the location of the symbol within a symbol + shape marker
By default, the symbol is centered within the shape, but you can position it anywhere you like.
- Choose Library > Markers from the Tour Builder menu
- On the Marker Library screen:
- Click the name of the marker you want to edit
- On the Edit Marker screen:
- Choose Positioned at X,Y from the Symbol Location dropdown
- Enter values for X and Y
Learn about Symbol + Shape Markers
How to set the map inset location, size, and overlay color
- Choose Map > Advanced Map Options from the Tour Builder menu
- On the Advanced Map Options screen:
- To change the location of the map inset choose an option from the Inset Location dropdown
- To change the size of the inset enter a value in the Inset Size text box
- To change the overlay color choose a color from the Inset Highlight Color option
Learn about MapZoom
How to set the order of hotspots in a slideshow
- Choose Map > Advanced Map Options from the menu
- On the Advanced Map Options screen:
- Use the Hotspot Order list to move hotspots up or down in the list to order them the way you want
Learn about Slideshow
How to set the order of pages in a tour
- Choose Tour > Tour Manager from the Tour Builder menu
- On the Tour Manager screen:
- Use the up/down arrows in the Menu and Directory Order list to reorder the pages
Note that this option only appears for tours that have more than one page.
Learn about Tours
How to set the popup background transparency (opacity)
You can control the opacity of a popup's background with the CSS shown below:
#maPopupPanel {
   background-color: rgba(255,255,255,0.65);
}
#maPopupTitle, #maPopupText {
   background-color: rgba(255,255,255, 0.0);
}
The CSS sets the popup's background color to white with 65% opacity. It sets the background color of the title and text to white with 0% opacity. You can of course choose any color and opacity you like. You can add the CSS in your tour in the CSS field on the Custom HMTL screen.
Learn about Layouts
How to set the popup size and appearance
- Choose Popup > Popup Size and Appearance from the Tour Builder menu
- On the Popup Size and Appearance screen:
- Customize the size and appearance settings
Learn about Layouts
How to set the size of the Map Editor
The dimensions of the Map Editor are determined by the tour's width and height setting on the Advanced Tour Layout screen.
You cannot change the size of the Map Editor for a Classic tour unless you change the tour's size and/or its layout. This is because the width and height of the Map Editor are the same as the dimensions of the tour's map area when the tour is displayed at its full size (not scaled down to fit a smaller browser window). The dimensions of the tour's map area are determined by the tour's layout and the values of the Width and Height options you specified for the tour on the Advanced Tour Layout screen.
The tour Width and Height values you specify for a Flex Map tour on the Advanced Tour Layout screen determine the size of the Map Editor. Those values do not affect the tour size because the maps in a Flex Map tour automatically size to best fit the device they are being displayed on. Therefore, you can change the tour width and height values for a Flex Map tour to make the Map Editor larger or smaller without affecting the size of the tour itself.
Learn about Map Editor
How to set the size of the directory panel
- Choose Tour > Directory Options from the Tour Builder menu
- On the Directory Options screen:
- Use the size options to control the width and height of the directory panel and preview
Learn about Directories
How to set the title bar text and background colors
- Choose Layout > Advanced Tour Layout from the Tour Builder menu
- On the Advanced Tour Layout screen
- Click the Edit link next to the Color Scheme dropdown
Learn about Title Bars and Footers
How to set the title bar text dynamically
Use the setTourTitle method in the API to dynamically change the tour's title text.
Learn about Title Bars and Footers
How to set the title bar text for a page
To set the title bar text for a Map:
- Choose Map > Advanced Map Options from the Tour Builder menu
- On the Advanced Map Options screen: Type the title bar text in the Map Title field
To set the title bar text for a Gallery:
- Choose Gallery > Advanced Gallery Options from the Tour Builder menu
- On the Advanced Gallery Options screen: Type the title bar text in the Gallery Title field
To set the title bar text for a Data Sheet:
- Choose Data Sheet > Edit Data Sheet Content from the Tour Builder menu
- On the Edit Data Sheet Content screen: Type the title bar text in the Data Sheet Title field
Learn about Title Bars and Footers
How to set the tour size for a Classic tour
- Choose Layout > Advanced Tour Layout from the Tour Builder menu
- On the Advanced Tour Layout screen:
- Enter the width and height for the tour when displayed in a browser
Learn about Layouts
How to set tiled page layout margins and spacing
- Choose Layout > Margins and Spacing from the Tour Builder menu
- On the Margins and Spacing screen:
- Type margin values in pixels in the Margins fields
- Type spacing values in pixels in the Spacing fields
Learn about Layouts
How to show a specific hotspot when a map displays
- Choose Hotspot > Advanced Hotspot Options in the Tour Builder menu
- On the Advanced Hotspot Options screen:
- The URL field at the top of the screen shows the URL to use to display that hotspot when the map first displays
The URL will be similar to tour.mapsalive.com/12345?hotspot=h1 where 12345 is the tour number and h1 is the Hotspot Id found on the Edit Hotspot Content screen.
Learn about URLs
How to show or hide the directory Search box
- Choose Tour > Directory Options from the Tour Builder menu
- On the Directory Options screen:
- Check or uncheck the Show Search Box checkbox
Learn about Directories
How to show or hide the image and text preview in the directory
- Choose Tour > Directory Options from the Tour Builder menu
- On the Directory Options screen:
- Check or uncheck the Show Image Preview and Show Text Preview boxes
Learn about Directories
How to style the help panel
You can use the CSS below to set the location of the top of the help panel. You can also style the panel's border, padding, background transparancy. Below is an example of CSS code in the CSS field on the Custom HMTL screen that positions the top of the help panel and defines its border.
#maHelpPanel {
   top: 220px;
   border:solid 3px #4b4c2d;
}
!important rule as shown in the the example below.
#maHelpPanel {
    left: 30px !important;
    background-color: rgba(255, 243, 193, 0.7) !important;
}
Learn about Help
How to turn off the 'Created with MapsAlive Free Trial' footer
The Free Trial footer displays for tours created with the Trial account.
The footer is removed automatically for all paid plans.
If you still see the Free Trial footer after purchasing a plan, try flushing your browser cache and/or clicking the Rebuild link on the Tour Manager screen.
Learn about Title Bars and Footers
How to turn on or off the header and footer stripes
- Choose Layout > Advanced Tour Layout from the Tour Builder menu
- On the Advanced Tour Layout screen
- Check or uncheck Header Stripe and/or Footer Stripe in the Layout Options section.
Learn about Title Bars and Footers
How to upgrade or purchase more hotspots
To upgrade from a Basic or Plus plan:
- Choose Account > Upgrade to the Plus Plan or Account > Upgrade to the Pro plan from the Tour Builder menu
To purchase additional hotspots for a Pro plan:
- Choose Account > Buy More Hotspots from the Tour Builder menu
Learn about V3 Compatibility
How to upload a gallery background image
- Choose Gallery > Choose Background Image from the Tour Builder Menu
- On the Choose Background Image screen:
- Choose an image file and then click the Load button
Learn about Galleries
How to upload map image to a map page
- Choose Map > Choose Map Image from the menu
- On the Choose Map Image screen:
- Click Choose File
- Choose a new map image from your computer and click Open
- Click Load
Learn about Maps
How to upload symbols to use for markers
- Choose New > Resource > Symbol from the Tour Builder menu
- On the Add Symbol screen:
- Type a symbol name
- Click Choose File
- Select the symbol file from your computer
- Click Open on the dialog
- Click Load
Once you upload a symbol into your account it will be available in the symbol dropdown lists on the Edit Marker screen. Remember that to use a symbol as a marker you have to create a marker that uses your new symbol.
Learn about Symbol Markers
How to upload tour
- Unzip the downloaded zip file into a folder on your computer.
- Rename the folder as you like. For example, if the tour is for a museum, you could rename
mapsalivetour12345tomuseum. - Upload the folder to your web server using an FTP program or other upload mechanism.
- Test that you can run the tour from a browser using the URL on your server, for example:
https://www.somedomain.com/maps/museum
Learn about Hosting Tours on Your Server
How to use a number, letter, or symbol that is already on my map image as a marker
You can take advantage of numbers, letters, and symbols that are already on your map image by creating a shape marker and then placing it over the number, letter, or symbol on the map in MapsAlive.
- Choose New > Resource > Marker from the Tour Builder menu
- On the Edit Marker screen:
- Choose Shape from the Marker Type dropdown
- Choose Rectangle or Circle from the Shape dropdown. For rectangles, you can set the width and height and for circles, you can set the radius.
- Choose a marker style from the Marker Style dropdown to define the normal and selected marker appearance. To see the map image under the marker, use a marker style that uses blend mode or reduce the opacity. Another option is to use a transparent marker style for the normal marker appearance.
Now you can associate your new marker with a hotspot and place the marker over the number, letter, or symbol on your map image.
Learn about Shape Markers
How to use multimedia content with a photo marker
A photo marker uses its hotspot's image for the photo, but what if the hotspot uses multimedia content like video? The Edit Hotspot Content screen only lets you choose media or multimedia for the hotspot, but here's how you can use a photo for the marker and still have the hotspot content be multimedia.
- Go to the Edit Hotspot Content screen for the hotspot you are interested in
- Make sure a photo marker is selected in the Marker dropdown.
- Chose Photo from the Media dropdown
- Upload the photo you want for the marker
- Choose Multimedia from the Media dropdown and click OK on the warning dialog
- Paste the embed code into the Multimedia text area
MapsAlive will use the photo you uploaded in step 4 as the marker image. When you mouse over that marker, the multimedia content you provide in step 6 will display. To change the image for a photo marker that is being used with multimedia content, repeat all of the steps above.
Learn about Photo Markers
How to use popups for a map or gallery
To use popups for a map:
- Choose Map > Setup from the Tour Builder menu
- On the Map Setup screen:
- Click the Popup radio button
To use popups for a gallery:
- Choose Gallery > Setup from the Tour Builder menu
- On the Gallery Setup screen:
- Click the Popup radio button
Learn about Layouts
How to use your domain name in a tour URL
To have the tour URL use your domain name, learn about hosting tours on your server.
Learn about URLs
Why are are the page names in my menu incorrect after converting from V3 to V4?
In V3, the value of the Map Name field on the Map > Map Setup screen was used as the menu name. In V4, if there is a value in the Map Title field on the Map > Advanced Map Options screen it will be used as the menu name. If the value is blank, the Map Name field is used. If your menu names are not correct, check the Map Title field and either modify the value or remove it.
Learn about Troubleshooting
Why are shape markers covering up symbol markers even though the symbols are higher in the stacking order?
This can be caused by an optimization in MapsAlive called marker caching. To disable marker caching, set the disable-caching tour setting to false. The example below shows how to do this using JavaScript coded on the Custom HTML screen.
function onEventTourLoaded(event) {
    event.api.setTourSetting("disable-caching", true);
}
If this solved the problem, but now the tour is performing slowly, please contact support@mapsalive.com.
Learn about Troubleshooting
Why are some previews on the Font Style Library or Tooltip Style Library screens too small?
This is a remnant of MapsAlive V3 which did not show actual-size previews. You can correct the preview by changing the style and then setting it back to what it was before. For example, set the font size larger, save the style, and then set the font size back to what it was before. This will cause MapsAlive to create a new preview image. Note that you must change something that affects the appearance of the style. Just changing the name of the style won't affect the preview.
Learn about Troubleshooting
Why can't I see the Publish button on the Tour Preview screen?
The Publish button displays in the upper right of the Tour Preview screen. If you have used custom CSS to position your directory or other HTML content above your map on the right hand side, it may be obscuring the Publish button. To make the button visible:
Learn about Troubleshooting
Why do <br> tags disappear from my Custom HTML?
This is a side affect of how the text editor handles HTML. To work around the problem, code <BR> instead of <br>.
Learn about Troubleshooting
Why do my map colors look different from the map image I uploaded?
This can happen when you upload a jpeg image that has its color profile set to something other the sRGB. When you upload the image, MapsAlive stores a copy of the original image at full size (unless it's larger than 4096x4096px, in which case MapsAlive will downsize the image), and also creates smaller versions to use when the map is displayed zoomed out and does not require so much resolution.
MapsAlive creates the smaller versions using the sRGB color profile. As such, the colors may look correct when the map is zoomed out, but not when zoomed in. To fix the problem, set the color profile to sRGB before uploading the image to MapsAlive.
To change the profile using PhotoShop:
- Open the image in PhotoShop
- Choose Edit > Assign Profile from the menu
- On the Assign Profile dialog:
- Choose the Profile option
- Select sRGB IEC6196602.1 (or something close to that)
Learn about Troubleshooting
Why do some markers that are on the map not show in the Map Editor?
This can happen when a very large map is zoomed out and some of the markers are both very small and the markers zoom. When the map is zoomed out, these markers can become so small that they become invisible. The solution is to either use larger markers or change the markers to not zoom.
Learn about Troubleshooting
Why don't I see my changes after publishing my tour?
This is most likely a browser cache problem. When you run your tour in a browser, the browser saves tour files in its cache. After you clear your browser cache and reload your tour, the browser gets the latest files.
See "How to clear your browser cache" above.
Learn about Troubleshooting
Why don't I see some of my marker in the Markers dropdown on the Edit Hotspot Content screen
Markers that are not in use by the current tour won't appear in the dropdown if you had checked the Filter Markers option. To see the markers, choose Library > Filter Markers and uncheck the option.
Learn about Troubleshooting
How to set a hotspot to use Live Data in the Tour Builder
- Choose Hotspot > Advanced Hotspot Options from the Tour Builder menu
- On the Advanced Hotspot Options screen:
- Check the Uses Live Data option as shown below
Learn about Requesting Hotspot Content
How to specify a Live Data hotspot's Live Data request function
- Choose Hotspot > Advanced Hotspot Options from the Tour Builder menu
- On the Advanced Hotspot Options screen:
- Specify a request function call in the Request Function field as shown below. If you leave the field blank, MapsAlive calls
onEventRequestLiveData(event).
- Specify a request function call in the Request Function field as shown below. If you leave the field blank, MapsAlive calls
Learn about Requesting Hotspot Content